Bulbs
Flower Basics
Flower Beds & Specialty Gardens
Flower Garden
Garden Furniture
Garden Gnomes
Garden Seeds
Garden Sheds
Garden Statues
Garden Tools & Supplies
Gardening Basics
Green & Organic
Groundcovers & Vines
Growing Annuals
Growing Basil
Growing Beans
Growing Berries
Growing Blueberries
Growing Cactus
Growing Corn
Growing Cotton
Growing Edibles
Growing Flowers
Growing Garlic
Growing Grapes
Growing Grass
Growing Herbs
Growing Jasmine
Growing Mint
Growing Mushrooms
Orchids
Growing Peanuts
Growing Perennials
Growing Plants
Growing Rosemary
Growing Roses
Growing Strawberries
Growing Sunflowers
Growing Thyme
Growing Tomatoes
Growing Tulips
Growing Vegetables
Herb Basics
Herb Garden
Indoor Growing
Landscaping Basics
Landscaping Patios
Landscaping Plants
Landscaping Shrubs
Landscaping Trees
Landscaping Walks & Pathways
Lawn Basics
Lawn Maintenance
Lawn Mowers
Lawn Ornaments
Lawn Planting
Lawn Tools
Outdoor Growing
Overall Landscape Planning
Pests, Weeds & Problems
Plant Basics
Rock Garden
Rose Garden
Shrubs
Soil
Specialty Gardens
Trees
Vegetable Garden
Yard Maintenance
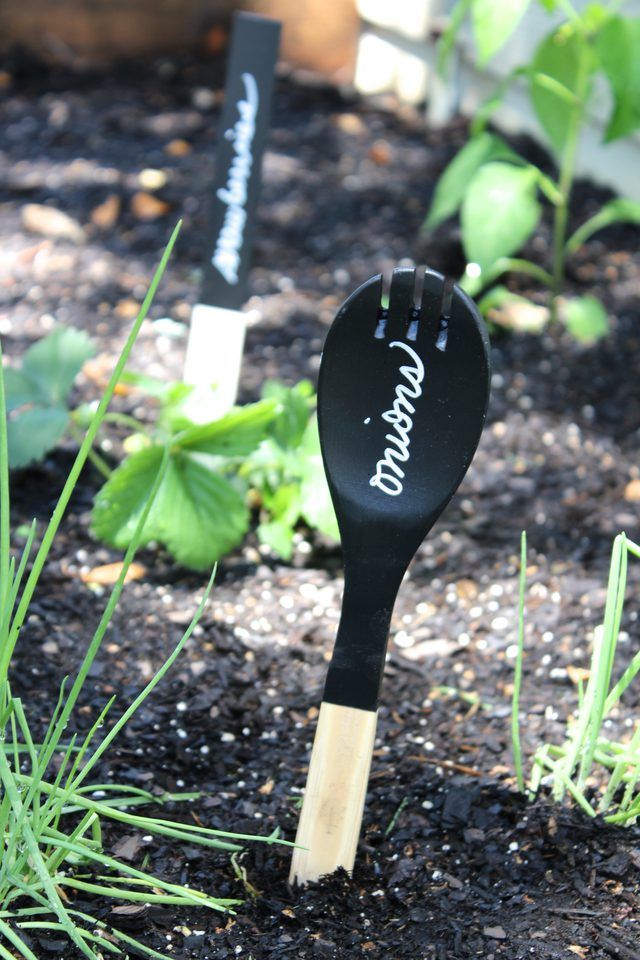
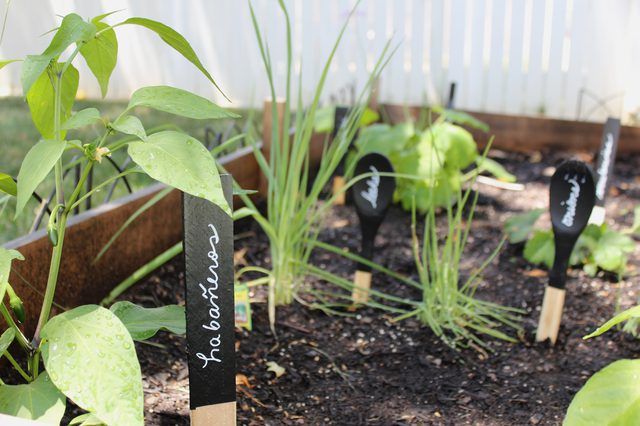
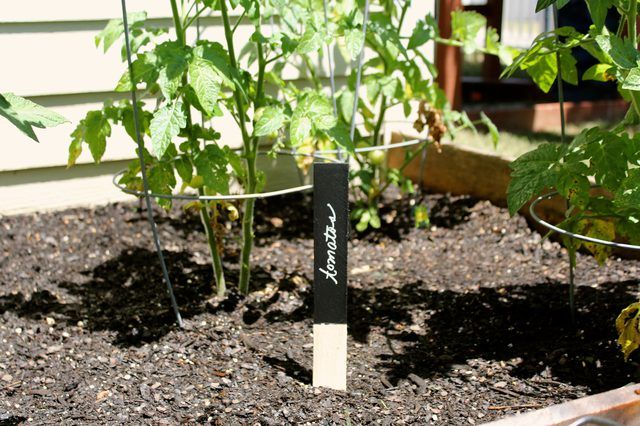
DIY Chalkboard Garden Markers
Create simple DIY chalkboard garden tags using household items such as wood shims, paint stick and wooden spoons.
Give your garden or raised beds a little character this summer by creating these DIY chalkboard garden markers to easily identify your herbs and vegetables. Household items such as wood shims, paint sticks and wooden spoons can be used to easily give your garden that extra touch.
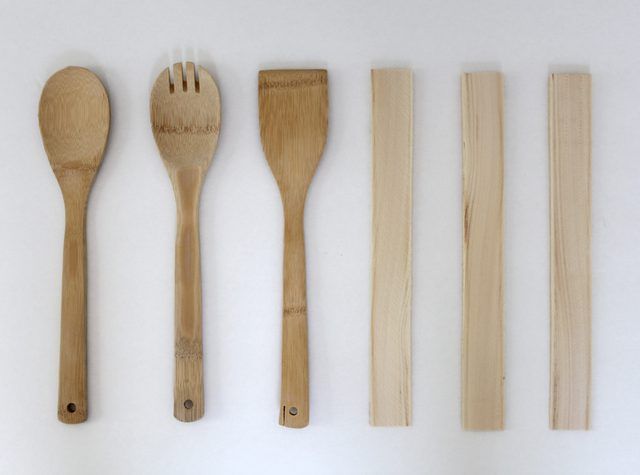
Things You'll Need
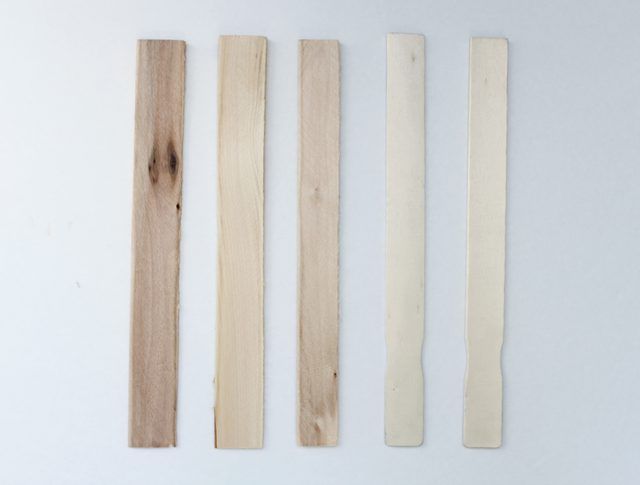
Wood shims, paint sticks or wooden spoons
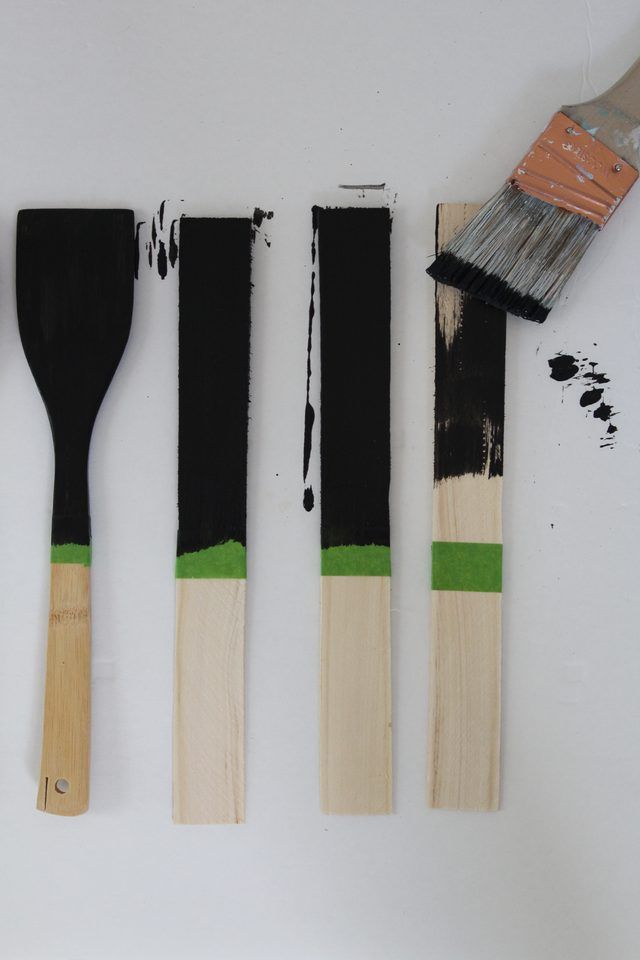
Painter's tape
Drop cloth or cardboard
Chalkboard paint�
Paintbrush
Chalk or chalk marker
Step 1
Gather your supplies and line up your wood shims, paint sticks or wooden spoons on a drop cloth or piece of cardboard for painting.

Step 2
Use painter's tape to tape off how far down you want your paint to go.
Tip
Leave enough room on your sticks to keep the paint from going into the ground so there are no chemicals that get into your soil.
Step 3
Paint two coats of paint on either side of your markers, allowing them to dry to the touch between each coat. When they are dry, remove the tape.
Step 4
Using plain chalk or a chalk marker, label your markers with the names of the herbs and vegetables in your garden.
Tip
You can use regular chalk if you like to easily erase and rename your markers, but the chalk could come off from rain and weather. A chalk marker will stay on better, and if you plant the same things each year, the label will still be useful. You can easily repaint your markers if necessary.

Step 5
Place your markers in the ground, leaving space between the ground and the paint.
Now your garden is complete, and all you need to do is water it and wait for your harvest!


