Bulbs
Flower Basics
Flower Beds & Specialty Gardens
Flower Garden
Garden Furniture
Garden Gnomes
Garden Seeds
Garden Sheds
Garden Statues
Garden Tools & Supplies
Gardening Basics
Green & Organic
Groundcovers & Vines
Growing Annuals
Growing Basil
Growing Beans
Growing Berries
Growing Blueberries
Growing Cactus
Growing Corn
Growing Cotton
Growing Edibles
Growing Flowers
Growing Garlic
Growing Grapes
Growing Grass
Growing Herbs
Growing Jasmine
Growing Mint
Growing Mushrooms
Orchids
Growing Peanuts
Growing Perennials
Growing Plants
Growing Rosemary
Growing Roses
Growing Strawberries
Growing Sunflowers
Growing Thyme
Growing Tomatoes
Growing Tulips
Growing Vegetables
Herb Basics
Herb Garden
Indoor Growing
Landscaping Basics
Landscaping Patios
Landscaping Plants
Landscaping Shrubs
Landscaping Trees
Landscaping Walks & Pathways
Lawn Basics
Lawn Maintenance
Lawn Mowers
Lawn Ornaments
Lawn Planting
Lawn Tools
Outdoor Growing
Overall Landscape Planning
Pests, Weeds & Problems
Plant Basics
Rock Garden
Rose Garden
Shrubs
Soil
Specialty Gardens
Trees
Vegetable Garden
Yard Maintenance
Lining a Garden Path With Rocks
Install rocks to edge your garden path by adding them after the main path is in place. Dig out some of the path material, then tamp the rocks in place.
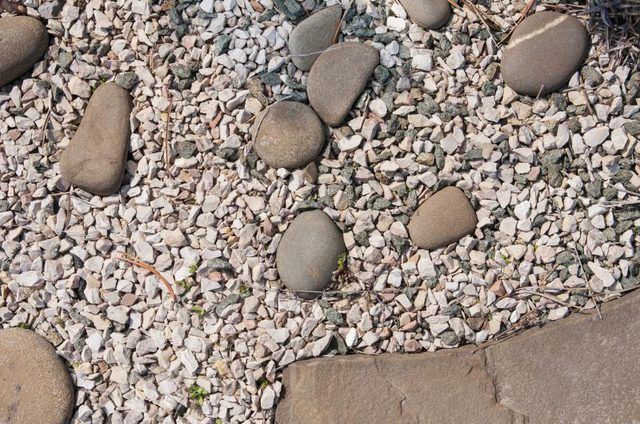
Rocks lining the edges of your garden path give it a more finished look, making it stand out from the surrounding landscape. The rocks also help contain the path materials a bit, whether gravel, tumbled stones or bark.

Choosing the Perfect Materials
The beauty of lining the edges of your path with rocks is you can use just about any type of rocks you like. Ideally, they should be large enough to stand out from the path itself; for instance, baseball-sized or larger. Select smoothed rocks found along a beach or river, or from a garden and landscape supply center. Cut, clean stone blocks or hunks of brick from a salvage yard are also options. Choose rock a different color than your path material for added contrast.
Lining Up the Rocks
Line the rocks up temporarily along the outside edges of the garden path; this allows you to rearrange them and find rocks that fit naturally well together, based on size or color variations. Set the rocks so they touch one another edge to edge for visual continuity.
Things You'll Need
Small plastic tarp
Small shovel
Rubber mallet
Garden trowel
Step 1
Set a plastic tarp within easy reach of the pathway so you have a place to deposit the path materials as you dig it up. The plastic makes it easier to redeposit the materials back onto the path later.
Step 2
Dig a shallow, narrow hole for each rock along one edge of the path -- inside the edging plastic or metal, if you used any. The hole should be just deep and wide enough to create an indentation for each rock to rest; 1/2 to 1 inch deep and 1 to 2 inches wide will suffice in many cases. Scoop the path materials onto the tarp as you dig the holes.
Step 3
Place the rocks into the shallow indentations you dug, lining them up edge to edge along the outside edge of the path. Rotate each rock or add some of the loose path material from the tarp to adjust the rocks so they do not wobble much, if at all.
Step 4
Dig out the other side of the path to create a similar indentation for the rocks along the other side. Set the rocks into the indentations, adjusting them as needed.
Step 5
Tamp the stones down gently along both sides with a rubber mallet to help set them in place.
Step 6
Fill in any gaps between or under parts of the rocks with the loose material atop the tarp. Scoop the materials with your hands or a garden trowel.
Step 7
Step gently atop each stone, without using all your weight, to help press it down a bit. If your shoes are dirty and you prefer to keep the stones clean, give them a few taps with the mallet instead.
Tip
For more edging options with instructions, see How to Edge a Garden Path.