Bulbs
Flower Basics
Flower Beds & Specialty Gardens
Flower Garden
Garden Furniture
Garden Gnomes
Garden Seeds
Garden Sheds
Garden Statues
Garden Tools & Supplies
Gardening Basics
Green & Organic
Groundcovers & Vines
Growing Annuals
Growing Basil
Growing Beans
Growing Berries
Growing Blueberries
Growing Cactus
Growing Corn
Growing Cotton
Growing Edibles
Growing Flowers
Growing Garlic
Growing Grapes
Growing Grass
Growing Herbs
Growing Jasmine
Growing Mint
Growing Mushrooms
Orchids
Growing Peanuts
Growing Perennials
Growing Plants
Growing Rosemary
Growing Roses
Growing Strawberries
Growing Sunflowers
Growing Thyme
Growing Tomatoes
Growing Tulips
Growing Vegetables
Herb Basics
Herb Garden
Indoor Growing
Landscaping Basics
Landscaping Patios
Landscaping Plants
Landscaping Shrubs
Landscaping Trees
Landscaping Walks & Pathways
Lawn Basics
Lawn Maintenance
Lawn Mowers
Lawn Ornaments
Lawn Planting
Lawn Tools
Outdoor Growing
Overall Landscape Planning
Pests, Weeds & Problems
Plant Basics
Rock Garden
Rose Garden
Shrubs
Soil
Specialty Gardens
Trees
Vegetable Garden
Yard Maintenance
How to Grow Hydrangeas From Cuttings
How to Grow Hydrangeas From Cuttings. Planted primarily for their abundant, showy flower clusters, hydrangeas (Hydrangea spp.) are mostly large shrubs native to Asia and North America. Of about 23 species, five are widely grown in gardens, with many cultivars available. Most hydrangea cultivars can only be multiplied reliably by rooting cuttings....
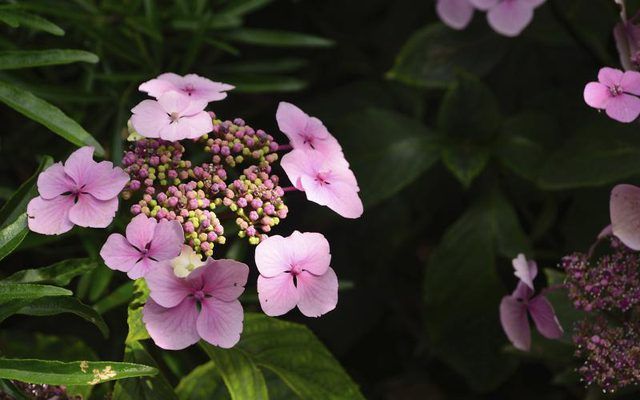
Planted primarily for their abundant, showy flower clusters, hydrangeas (Hydrangea spp.) are mostly large shrubs native to Asia and North America. Of about 23 species, five are widely grown in gardens, with many cultivars available. Most hydrangea cultivars can only be multiplied reliably by rooting cuttings. Varieties with only sterile flowers can't produce seeds and must come from cuttings. Except for species hydrangeas, cultivars that produce seeds don't produce seedlings that resemble the parents. If you want a replicate of the parent, propagate it from cuttings.
Getting Ready
Cleanliness is essential to successfully rooting hydrangea. Wipe the pruner blades with a cloth soaked in rubbing alcohol. This kills disease organisms and prevents pathogens from spreading. Clean 4-inch pots with drainage holes in hot, soapy water. After rinsing in clean water, soak the pots in a solution of 1 part household bleach to 9 parts water for at least five minutes. Rinse well in clean water and let dry. Fill the pots within an inch of the rim with a rooting mix such as equal parts of peat and perlite. Time propagation in mid- to late summer when flowers have formed and the stems are still green.
Finding the Cutting
Locate a hydrangea stem that hasn't flowered, since flowering lessens the concentration of plant hormones in the stem. Such hormones promote rooting. You can test for the proper stem development needed by bending a green stem. It should snap cleanly, rather than just bending, and shouldn't show any brown wood development.
Taking the Cutting
With the cleaned pruners, remove the top part of a stem that contains several leaves. Cut the stem just below a node, which is the area of the stem where a leaf emerges. Cut the stem into shorter pieces, each about 5 inches long and containing three to four nodes. Clean the pruning shears with alcohol between each stem pruned from the bush.
Preparing the Cutting
Have ready a small, clean container with some rooting hormone in it. Don't dip cuttings into the entire container of rooting hormone, which can contaminate it. Remove the lower two leaves from the cutting if leaves are present. Immediately dip the stem base into the rooting hormone, coating the freshly cut end and any wounds made from removing the leaves. Cut off the outer half of any remaining leaves to lessen water use by the cutting.
Sticking the Cutting
Make a hole in the center of the rooting medium filling the 4-inch pot using a pencil or a chopstick. This prevents scraping off the rooting hormone, which might occur if you just push the cutting itself into the rooting mix. Insert the cutting so that two nodes are below the potting mix and firm the mix around it, keeping it upright.
Keeping Up Humidity
You'll need to keep the cutting alive until it roots, so it needs a humid environment. Put a large, clear plastic bag over the cutting, holding it off the leaves with stakes inserted into the potting mix if need be. Put the cutting in the shade. Sunlight would cook it. Lift the bag and mist the cutting several times a day. Keep the rooting mix moist but not soggy.
Rooting and Transplanting
After about four weeks, gently tug on the cutting to see if it still moves freely. If it resists, roots have formed. Remove the plastic bag. Fast-growing species root more quickly than slow-growing ones. When a fibrous root system holds the rooting medium together, transplant the cutting into a 6-inch container that has drainage holes. Use the same rooting mix, but with the addition of a controlled-release fertilizer such as 15-9-12 at the rate of 1 1/2 teaspoons per 6-inch pot.
Overwintering Conditions
A newly rooted cutting in a pot isn't strong enough or well-insulated enough to endure the winter weather that an established plant can withstand. For instance, although bigleaf hydrangea (Hydrangea macrophylla) is hardy in U.S. Department of Agriculture plant hardiness zones 5b through 9a, take the transplanted cutting into a protected area such as a garage or shed if temperatures in the low teens are predicted. Plants can usually be put in their garden locations the next spring.


