Bulbs
Flower Basics
Flower Beds & Specialty Gardens
Flower Garden
Garden Furniture
Garden Gnomes
Garden Seeds
Garden Sheds
Garden Statues
Garden Tools & Supplies
Gardening Basics
Green & Organic
Groundcovers & Vines
Growing Annuals
Growing Basil
Growing Beans
Growing Berries
Growing Blueberries
Growing Cactus
Growing Corn
Growing Cotton
Growing Edibles
Growing Flowers
Growing Garlic
Growing Grapes
Growing Grass
Growing Herbs
Growing Jasmine
Growing Mint
Growing Mushrooms
Orchids
Growing Peanuts
Growing Perennials
Growing Plants
Growing Rosemary
Growing Roses
Growing Strawberries
Growing Sunflowers
Growing Thyme
Growing Tomatoes
Growing Tulips
Growing Vegetables
Herb Basics
Herb Garden
Indoor Growing
Landscaping Basics
Landscaping Patios
Landscaping Plants
Landscaping Shrubs
Landscaping Trees
Landscaping Walks & Pathways
Lawn Basics
Lawn Maintenance
Lawn Mowers
Lawn Ornaments
Lawn Planting
Lawn Tools
Outdoor Growing
Overall Landscape Planning
Pests, Weeds & Problems
Plant Basics
Rock Garden
Rose Garden
Shrubs
Soil
Specialty Gardens
Trees
Vegetable Garden
Yard Maintenance
How to Propagate Ivy Plants
How to Propagate Ivy Plants. It's surprisingly simple to propagate English ivy (Hedera helix) by rooting vines that touch the ground, which is a process called layering. You can also root cuttings or grow ivy from seed. Many plants with vines are commonly called ivies but they are not true ivies. English ivy grows outdoors in U.S. Department of...
It's surprisingly simple to propagate English ivy (Hedera helix) by rooting vines that touch the ground, which is a process called layering. You can also root cuttings or grow ivy from seed. Many plants with vines are commonly called ivies but they are not true ivies. English ivy grows outdoors in U.S. Department of Agriculture plant hardiness zones 5 through 9 or as a houseplant.

English ivy produces blue-black berries, each of which contain three to five fleshy seeds about 1/3 inch wide. Remove the pulp from the berries, then store the seeds in the refrigerator for a month to improve their germination rate. Plant them about 2/3 inch deep in spring after all danger of frost has passed. Choose a spot where they will get from six to eight hours of sun a day. Keep the soil moist but not soggy. The seeds should germinate in four to eight weeks.

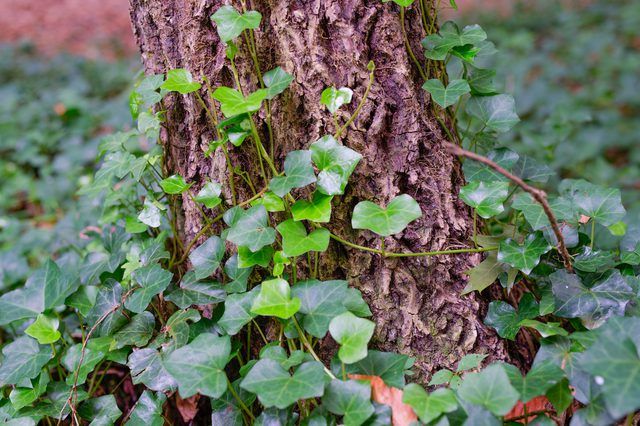
English ivy spreads on the ground naturally by layering, which partially explains its invasive tendencies. Pale green ivy runners or vines spread along the ground and climb walls and trees. Leaves and roots grow from nodes along the runners. In summer, pin a runner to the ground with wire landscape staples or pieces of wire formed into U-shapes. Keep the soil moist around the pinned runner and roots will grow from these nodes. When they do, use a knife to cut 3-inch-long sections from the runner with a rooted node in the middle of each section. Sterilize the knife before and after cutting using a household disinfectant spray. Dig up the rooted sections, plant them out of direct sunlight in a planting mix of 1 part peat moss and 1 part vermiculite and water regularly. Use a pot with drainage holes for the ivy.

When English completes its spring and summer growth, use a sharp, disinfected knife to cut an ivy runner into 3-inch sections with a node in the center of each section. Remove the leaves from the bottom 1 inch of the cutting and bury it 1 inch deep in a growing flat or pot with holes in the bottom and filled with a mix of 1 part peat moss and 1 part vermiculite. Place the flat or pot in a tray of water until the surface is moist, then allow it to drain. Cover the cuttings with burlap or cheesecloth, put them in indirect light and water regularly to keep them from drying out. The cuttings will begin to harden in about a week and root in one to two months.

Prepare root cuttings the same way you did for rooting them in potting media. The difference is that you root the nodes in water, not potting media. Put the cuttings in 3 inches or less of water and set them in indirect light or in a window that faces north. They will grow roots, but not the smaller root hairs they will need to absorb water from the soil. To develop root hairs, place the rooted cuttings in a moist soilless mix inside a plastic bag. Donít let the mix dry out. Open the plastic bag after a few days and the cuttings will grow root hairs.

English ivy naturally propagates by layering along the forest floor. The vine nodes grow roots and more vines. The vines spread, forming dense mats that smother plants that get in their way. Classified as an invasive weed in many areas, you may not want ivy in your yard and you may choose to reconsider propagating it because it can destroy native habitats. You can pull ivy up by its roots, but if that doesn't work, cut the ivy with a string trimmer then spray it with a 2 percent solution of the herbicide 2-4-D. Follow the dilution rates on the label, but they're generally equal to 1 1/3 ounces of 2-4-D diluted in 1 gallon of water. Use a backpack sprayer and spray on a clear, windless day. The temperature should be above 65 degrees Fahrenheit. Wear long pants, a long-sleeved shirt, chemical-resistant gloves and goggles when working with weedkillers and follow the safety instructions on the label.
