Bulbs
Flower Basics
Flower Beds & Specialty Gardens
Flower Garden
Garden Furniture
Garden Gnomes
Garden Seeds
Garden Sheds
Garden Statues
Garden Tools & Supplies
Gardening Basics
Green & Organic
Groundcovers & Vines
Growing Annuals
Growing Basil
Growing Beans
Growing Berries
Growing Blueberries
Growing Cactus
Growing Corn
Growing Cotton
Growing Edibles
Growing Flowers
Growing Garlic
Growing Grapes
Growing Grass
Growing Herbs
Growing Jasmine
Growing Mint
Growing Mushrooms
Orchids
Growing Peanuts
Growing Perennials
Growing Plants
Growing Rosemary
Growing Roses
Growing Strawberries
Growing Sunflowers
Growing Thyme
Growing Tomatoes
Growing Tulips
Growing Vegetables
Herb Basics
Herb Garden
Indoor Growing
Landscaping Basics
Landscaping Patios
Landscaping Plants
Landscaping Shrubs
Landscaping Trees
Landscaping Walks & Pathways
Lawn Basics
Lawn Maintenance
Lawn Mowers
Lawn Ornaments
Lawn Planting
Lawn Tools
Outdoor Growing
Overall Landscape Planning
Pests, Weeds & Problems
Plant Basics
Rock Garden
Rose Garden
Shrubs
Soil
Specialty Gardens
Trees
Vegetable Garden
Yard Maintenance
How to Use a Rototiller
How to Use a Rototiller. Whether you're starting a new planting bed or adding amendments to an existing one, a rototiller is a useful piece of equipment. The rotating tines break up the ground to create loose soil that drains well. Before you rev up the rototiller, give yourself a crash course in using the machine properly so you don't do more harm...

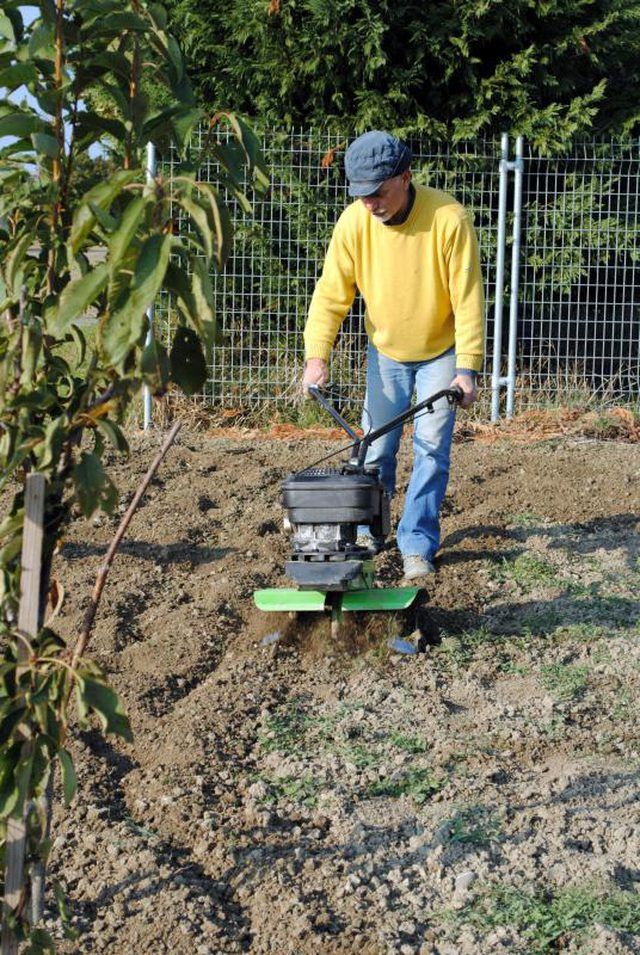
Whether you're starting a new planting bed or adding amendments to an existing one, a rototiller is a useful piece of equipment. The rotating tines break up the ground to create loose soil that drains well. Before you rev up the rototiller, give yourself a crash course in using the machine properly so you don't do more harm than good.
Evaluate the Conditions
The weather and garden conditions affect how well the tiller works. If you use a rototiller on wet ground, the soil will clump up. As it dries, the clumps become hard clods of dirt that are difficult to break up. Plants don't grow well in the clumpy soil. Tilling when the soil is too dry means the ground is hard and difficult to till. A rear-tine tiller is more powerful and better able to tackle hard soil than a front-tine tiller. The soil temperature is another factor in successful tilling. Wait until the soil is at least 60 degrees Fahrenheit before tilling. If the conditions are correct for tilling, walk through the area and remove and debris, such as rocks or sticks, that can get caught or thrown by the tiller tines.
Prep the Machine
Inspect the rototiller before each use to make sure the tines are secure and not damaged. Check the fuel tank to ensure the tiller is full. Tillers come with a depth adjustment that allows you to control how deeply the tines go into the ground. The initial pass is generally shallow, with a second pass at a deeper setting. If the ground is hard, start with the shallowest setting to break through the dirt. Position the tiller at the starting point -- usually at one corner of the garden.
Till the Soil
With the tiller in position, you are ready to start the machine. Rototillers pull themselves along, but you need a steady grip on the handlebars to control the machine. On a front-tine tiller, you need to pull up on the handle to get the tines to go into the dirt, which then pulls the machine along. You may need to hold the tiller back to thoroughly break up the soil so the tines don't move too quickly. A rear-tine tiller is usually heavier, which helps keep the tines in the ground. The engine controls the tines separate from the wheels, allowing more control over the speed. The rear-tine style generally takes less physical effort to control than a front-tine machine. Make a full pass down the length of the garden in a straight line. When you get to the end, turn the machine and move over slightly to make a parallel pass that slightly overlaps the first pass. Continue making parallel passes along the entire length of the garden. You're now ready to make a second, deeper pass. Set the rototiller to the deepest setting available. Your second set of passes should run perpendicular to the initial passes.
Add Amendments
If you're using the rototiller to incorporate amendments, such as compost, lime or fertilizer, into the soil, you want to add them after you've made your initial pass with the machine. This gets the soil loose and makes the amendments easier to incorporate. Distribute the necessary amount of the specific material you're adding to the soil to the freshly tilled area. Set the tiller for the depth that you want the material incorporated -- typically 6 to 8 inches. Position the tiller at one edge of the garden and make passes just as you did the first time. Working in a controlled pattern from one side of the garden to the other ensures the amendments get mixed in evenly.