Bulbs
Flower Basics
Flower Beds & Specialty Gardens
Flower Garden
Garden Furniture
Garden Gnomes
Garden Seeds
Garden Sheds
Garden Statues
Garden Tools & Supplies
Gardening Basics
Green & Organic
Groundcovers & Vines
Growing Annuals
Growing Basil
Growing Beans
Growing Berries
Growing Blueberries
Growing Cactus
Growing Corn
Growing Cotton
Growing Edibles
Growing Flowers
Growing Garlic
Growing Grapes
Growing Grass
Growing Herbs
Growing Jasmine
Growing Mint
Growing Mushrooms
Orchids
Growing Peanuts
Growing Perennials
Growing Plants
Growing Rosemary
Growing Roses
Growing Strawberries
Growing Sunflowers
Growing Thyme
Growing Tomatoes
Growing Tulips
Growing Vegetables
Herb Basics
Herb Garden
Indoor Growing
Landscaping Basics
Landscaping Patios
Landscaping Plants
Landscaping Shrubs
Landscaping Trees
Landscaping Walks & Pathways
Lawn Basics
Lawn Maintenance
Lawn Mowers
Lawn Ornaments
Lawn Planting
Lawn Tools
Outdoor Growing
Overall Landscape Planning
Pests, Weeds & Problems
Plant Basics
Rock Garden
Rose Garden
Shrubs
Soil
Specialty Gardens
Trees
Vegetable Garden
Yard Maintenance
How to Polish Rocks by Hand
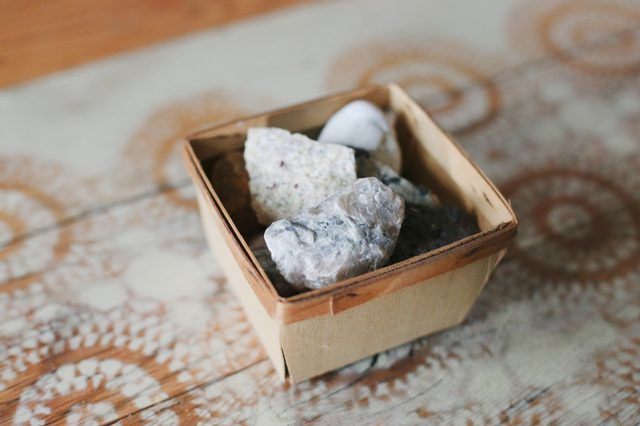
How to Polish Rocks by Hand. Rock collecting is a fun hobby and a great way to learn about geology. But after you've spent a day collecting rocks, what do you do with them? If the rocks are hard enough and you have a rock tumbler, you may want to polish them using the tumbler. However, if the rocks you have found are of a softer variety, you may...
Rock collecting is a fun hobby and a great way to learn about geology. But after you've spent a day collecting rocks, what do you do with them? If the rocks are hard enough and you have a rock tumbler, you may want to polish them using the tumbler. However, if the rocks you have found are of a softer variety, you may get better results polishing them by hand. This can be a little time consuming, depending on the hardness of the rock, but hand-polishing will give you more control over your final result. You'll also be able to see the changes take place right before your very eyes.
Things You'll Need
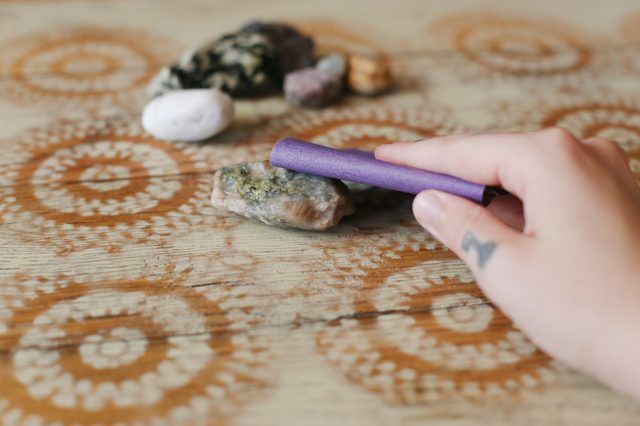
Sandpaper, 80 grit
Sandpaper, 180 grit
Sandpaper, 600 grit
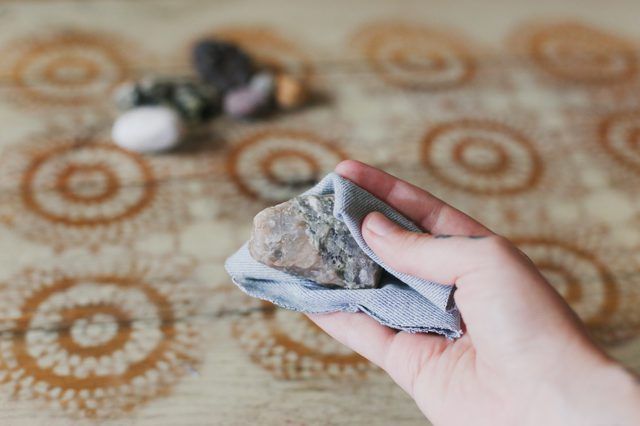
Piece of scrap denim cloth
Powdered polish
Step 1
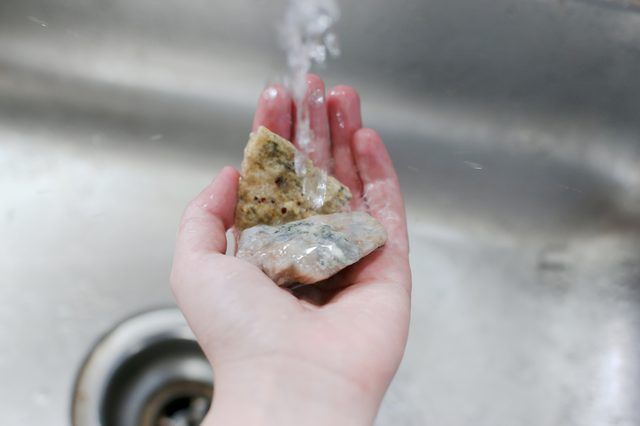
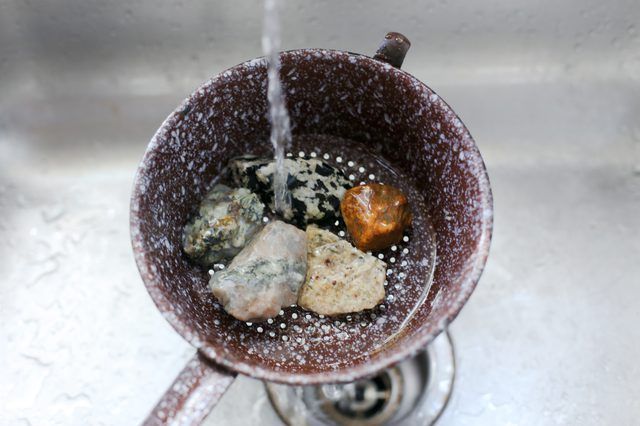
Wet the rock and use the 80-grit sandpaper to roughly shape and round the corners of the stone. Keep a bucket of water nearby so that you can continue to wet the rock as needed. Continue this until the rock has been shaped to your satisfaction.
Step 2
Use the 180-grit sandpaper to further refine the shape of your rock and to remove any heavy scratches. Make sure to keep the rock wet throughout this process as well.
Step 3
With the rock still wet, use the 600-grit sandpaper to get rid of any lighter scratches on the rock's surface. Rinse the rock with water often during this step.
Step 4
Place a bit of powdered polish on a damp denim cloth. Polish the rock with the cloth until you are satisfied with the result. Depending on the rock, you may have to keep adding polish to the damp cloth at regular intervals.


