Bulbs
Flower Basics
Flower Beds & Specialty Gardens
Flower Garden
Garden Furniture
Garden Gnomes
Garden Seeds
Garden Sheds
Garden Statues
Garden Tools & Supplies
Gardening Basics
Green & Organic
Groundcovers & Vines
Growing Annuals
Growing Basil
Growing Beans
Growing Berries
Growing Blueberries
Growing Cactus
Growing Corn
Growing Cotton
Growing Edibles
Growing Flowers
Growing Garlic
Growing Grapes
Growing Grass
Growing Herbs
Growing Jasmine
Growing Mint
Growing Mushrooms
Orchids
Growing Peanuts
Growing Perennials
Growing Plants
Growing Rosemary
Growing Roses
Growing Strawberries
Growing Sunflowers
Growing Thyme
Growing Tomatoes
Growing Tulips
Growing Vegetables
Herb Basics
Herb Garden
Indoor Growing
Landscaping Basics
Landscaping Patios
Landscaping Plants
Landscaping Shrubs
Landscaping Trees
Landscaping Walks & Pathways
Lawn Basics
Lawn Maintenance
Lawn Mowers
Lawn Ornaments
Lawn Planting
Lawn Tools
Outdoor Growing
Overall Landscape Planning
Pests, Weeds & Problems
Plant Basics
Rock Garden
Rose Garden
Shrubs
Soil
Specialty Gardens
Trees
Vegetable Garden
Yard Maintenance
How to Transplant Hydrangeas
How to Transplant Hydrangeas. One of summer's most recognizable flowers, hydrangeas (Hydrangea spp.) feature large clusters of tiny flowers. Hydrangeas do best in an area with full sun and some late afternoon shade, and they might require transplanting from their original location to provide the best environment. Grown in U.S. Department of...

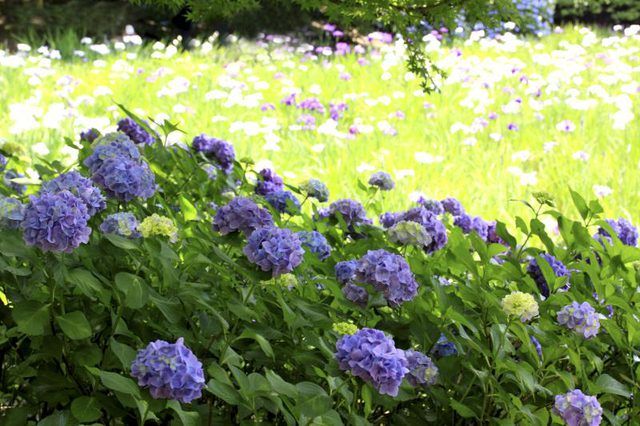
One of summer's most recognizable flowers, hydrangeas (Hydrangea spp.) feature large clusters of tiny flowers. Hydrangeas do best in an area with full sun and some late afternoon shade, and they might require transplanting from their original location to provide the best environment. Grown in U.S. Department of Agriculture plant hardiness zones 3 through 9, common hydrangea species include the pink or blue mophead variety (Hydrangea macrophylla), grown in USDA zones 6 through 9, and climbing hydrangea and oakleaf hydrangea, both hardy in USDA zones 5 through 9.
Transplant Time
Hydrangeas should be transplanted when they are dormant for winter so the energy needed for transplant recovery doesn't steal energy needed for growth and flower production. This also ensures plenty of time to recover -- all spring and summer -- as they enter the next dormant period. Technically, transplanting can be done any time between the first frost in late fall to the last frost in early spring, but the best time is in late winter to early spring. At this time, the ground begins to soften to make digging easier, and the hydrangeas don't have to contend with harsh winter weather.
Plant Preparation
Little preparation is needed if the hydrangea was planted within the last year and isn't completely established in its site. For more established hydrangeas with vast root systems, root pruning in fall forces the plant to develop a dense network of short roots that reduces transplant shock. Cut a wide circle at least 24 inches in diameter with a sharp spade to sever roots. You can also cut back hydrangeas to make them more manageable. Prune mophead, climbing and oakleaf hydrangeas immediately after flowering because they develop the next year's flowers in late summer to early fall. Prune panicle hydrangeas (Hydrangea paniculata) and smooth hydrangeas (Hydrangea arborescens), hardy in USDA zones 4 through 8 and 4 through 9 respectively, in fall or late winter because they develop new buds in spring. Cut back no more than one-third of a hydrangea's total height.
Site Preparation
Advanced site preparation increases the chance of transplant success. Dig the hole and have it ready before you ever dig up the hydrangea plant. Loosen the soil in an area as wide and deep as possible so the roots can easily pass through the loose soil. The hole itself should be as deep as the rootball height, usually about 24 inches, and two to three times the diameter of the rootball. If you root-prune a rootball that's 24 inches in diameter, the planting hole should measure 4 to 6 feet across. Hydrangeas need soil with adequate drainage to avoid root rot, so work in some organic matter and coarse sand, if needed, to build soil structure. Add sphagnum peat moss to increase acidity or agricultural lime to increase alkalinity if the soil pH falls outside the range of about 5.2 to 7.5.
Moving and Planting
Spades work well for cutting the soil around the hydrangea plant, while a round-point shovel pulled backward provides leverage to break the bottom roots free from the soil. Remove the plant from its hole and set it on a piece of burlap. Wrap the rootball in the burlap to protect the roots. A large bush with large rootball can weigh hundreds of pounds, so recruit helpers to move it to its new site. Use a garden cart or truck to transport the hydrangea. Alternatively, set the plant on a canvas drop cloth and pull it across the lawn to its new site. Set the plant in its hole so the top of the rootball rests evenly with the surrounding soil grade. Backfill the hole with soil up to the rootball level.
After Care
One deep watering at the time of transplanting is usually enough until spring growth begins. The hydrangea is still dormant and doesn't require much water. Leave a soaker hose on in the area for several hours to ensure slow, steady watering that makes the soil in the hole and surrounding area evenly moist. The soil in the hole settles as the water fills in air pockets, so add more soil to bring the level back up to grade. Add fertilizer at transplanting time or wait until new growth begins in spring. Use a water-soluble, all-purpose, complete fertilizer mixed at a rate of 1 tablespoon fertilizer to 1 gallon of water. Add the fertilizer as part of the regular watering routine. Expect to use 1 gallon of fertilizer for every 10 square feet.