Bulbs
Flower Basics
Flower Beds & Specialty Gardens
Flower Garden
Garden Furniture
Garden Gnomes
Garden Seeds
Garden Sheds
Garden Statues
Garden Tools & Supplies
Gardening Basics
Green & Organic
Groundcovers & Vines
Growing Annuals
Growing Basil
Growing Beans
Growing Berries
Growing Blueberries
Growing Cactus
Growing Corn
Growing Cotton
Growing Edibles
Growing Flowers
Growing Garlic
Growing Grapes
Growing Grass
Growing Herbs
Growing Jasmine
Growing Mint
Growing Mushrooms
Orchids
Growing Peanuts
Growing Perennials
Growing Plants
Growing Rosemary
Growing Roses
Growing Strawberries
Growing Sunflowers
Growing Thyme
Growing Tomatoes
Growing Tulips
Growing Vegetables
Herb Basics
Herb Garden
Indoor Growing
Landscaping Basics
Landscaping Patios
Landscaping Plants
Landscaping Shrubs
Landscaping Trees
Landscaping Walks & Pathways
Lawn Basics
Lawn Maintenance
Lawn Mowers
Lawn Ornaments
Lawn Planting
Lawn Tools
Outdoor Growing
Overall Landscape Planning
Pests, Weeds & Problems
Plant Basics
Rock Garden
Rose Garden
Shrubs
Soil
Specialty Gardens
Trees
Vegetable Garden
Yard Maintenance
How to Start Plum Trees From Seed
How to Start Plum Trees From Seed. Plums picked fresh from your own tree are often sweeter and juicier than the ones in the supermarket. Having plum trees in the yard offers an added bonus: delicate, eye-catching flowers in early spring. Members of the genus Prunus, plums are divided into European (Prunus domestica), Japanese (Prunus salicina),...
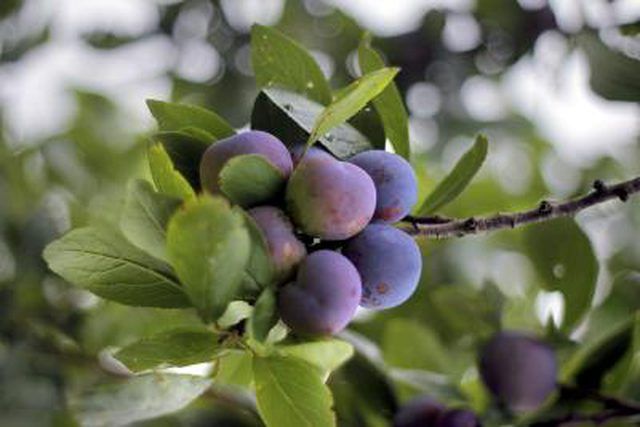
Plums picked fresh from your own tree are often sweeter and juicier than the ones in the supermarket. Having plum trees in the yard offers an added bonus: delicate, eye-catching flowers in early spring. Members of the genus Prunus, plums are divided into European (Prunus domestica), Japanese (Prunus salicina), both hardy in U.S. Department of Agriculture plant hardiness zones 4 through 9 and American types (Prunus americana, hardy in USDA zones 3 through 8) with many varieties available. Plums readily grow from seed with proper preparation and care.
Scarify Fearlessly
Plums are called stone fruit for good reason. Their seeds, like those of close relatives such as peaches, are encased in a hard pit. The pit must be broken, scratched, cracked or otherwise altered to allow the seed to germinate. In cold climates, you can plant the pit in the fall and freezing winter weather will scarify it for you. If you're in a hurry, you can crack the pit with a hammer or scratch it with sandpaper or a nail file. Another method is to bring a pot of water to a boil, take the pot off the stove and toss in the plum pits. Once the water cools to room temperature, the pits are ready for the next step.
Stratify by Degrees
The seed inside the pit will not germinate until it has undergone a period of chilling. In cold climates this, like scarification, may be accomplished naturally when the pit is planted in the fall and is subject to winter's chill. To stratify seeds indoors, you can remove them from the pit, mix them with moistened sand or peat moss and place the mixture in a covered container in the refrigerator. To mimic the winter season that seeds would experience outdoors, keep them in the refrigerator for 90 days. The seeds can be planted once they sprout.
Plant Properly
Plum seeds should be planted about 2 inches deep. Plant fresh plum pits in the fall to allow natural stratification and scarification. Plant seeds scarified and stratified mechanically in the spring. Most plum trees require cross-pollination to produce fruit, so plant other plum trees 18 to 22 feet away from the first one. Plums like full sun and well-drained soil but aren't picky about soil type. Before planting, conduct a soil test to check whether the pH level is between 6.0 and 6.5 and, if not, amend the soil to bring the pH within that range.
Basic Care
Keep the newly planted seeds moist but not wet until the seedling is well-established. Don't fertilize the seedlings. Once the seedling is growing well, it should thrive on normal rainfall. During especially hot or dry periods, spread a layer of mulch around but not touching the seedling. A 4-inch layer of organic mulch will help keep the roots cool and conserve moisture. As the mulch decomposes, it will help replenish nutrients in the soil.


