Bulbs
Flower Basics
Flower Beds & Specialty Gardens
Flower Garden
Garden Furniture
Garden Gnomes
Garden Seeds
Garden Sheds
Garden Statues
Garden Tools & Supplies
Gardening Basics
Green & Organic
Groundcovers & Vines
Growing Annuals
Growing Basil
Growing Beans
Growing Berries
Growing Blueberries
Growing Cactus
Growing Corn
Growing Cotton
Growing Edibles
Growing Flowers
Growing Garlic
Growing Grapes
Growing Grass
Growing Herbs
Growing Jasmine
Growing Mint
Growing Mushrooms
Orchids
Growing Peanuts
Growing Perennials
Growing Plants
Growing Rosemary
Growing Roses
Growing Strawberries
Growing Sunflowers
Growing Thyme
Growing Tomatoes
Growing Tulips
Growing Vegetables
Herb Basics
Herb Garden
Indoor Growing
Landscaping Basics
Landscaping Patios
Landscaping Plants
Landscaping Shrubs
Landscaping Trees
Landscaping Walks & Pathways
Lawn Basics
Lawn Maintenance
Lawn Mowers
Lawn Ornaments
Lawn Planting
Lawn Tools
Outdoor Growing
Overall Landscape Planning
Pests, Weeds & Problems
Plant Basics
Rock Garden
Rose Garden
Shrubs
Soil
Specialty Gardens
Trees
Vegetable Garden
Yard Maintenance
How to Store a Lawn Mower Battery for Winter
How to Store a Lawn Mower Battery for Winter. When summer ends and it’s time to put your electric-start lawn mower away for the winter season, take care to properly store the mower battery. Careful winter storage involves cleaning and charging the battery before putting it up for the season. This will maximize the battery’s service life...
When summer ends and it�s time to put your electric-start lawn mower away for the winter season, take care to properly store the mower battery. Careful winter storage involves cleaning and charging the battery before putting it up for the season. This will maximize the battery�s service life and ensure the battery will be ready to start up your mower when the grass begins growing again in the spring.

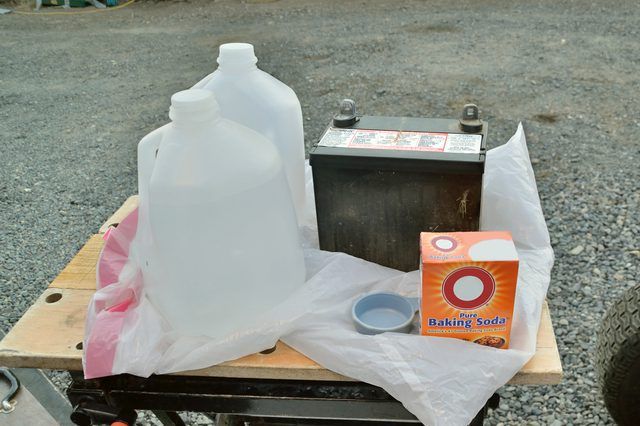
Things You'll Need
Wrench set
Work gloves
Flat and Phillips screwdrivers
Old rags
Soft bristle brush
Baking soda
Battery charger
Sturdy table or workbench
Cardboard box
Step 1
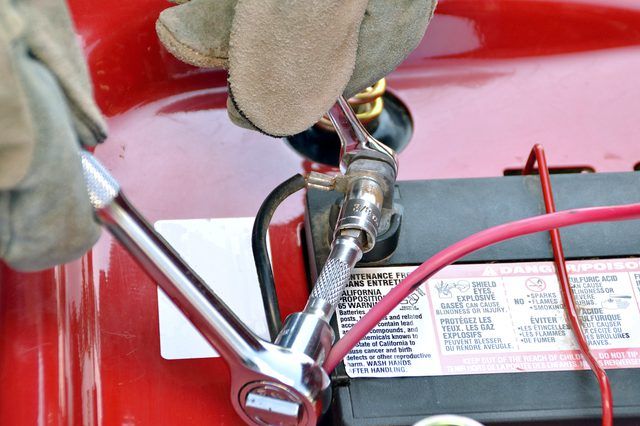
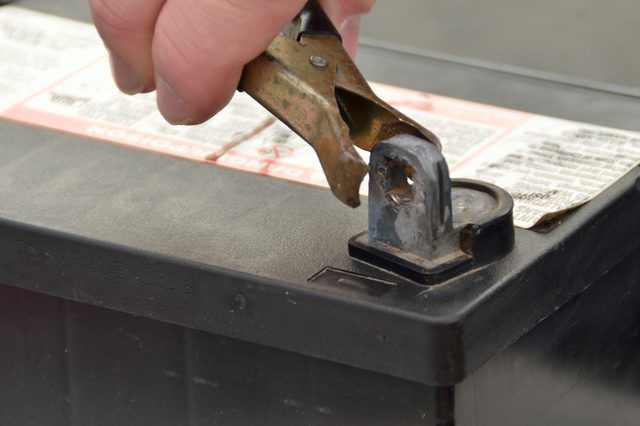
Remove the battery from the mower. Access the battery by opening the mower�s hood, if so equipped, then use a wrench or screwdriver to remove any covers, shrouds or panels that block access to the battery. Disconnect the black or negative cable first. Use a wrench to undo the bolt or nut holding the cable to the battery terminal. Pull the cable off the terminal and move it out of your way, making sure the cable end does not touch metal. Disconnect the red or positive cable in the same fashion. Undo the bolts or nuts securing any battery hold-down frame or clamp and move the hold-down out of the way.
Step 2
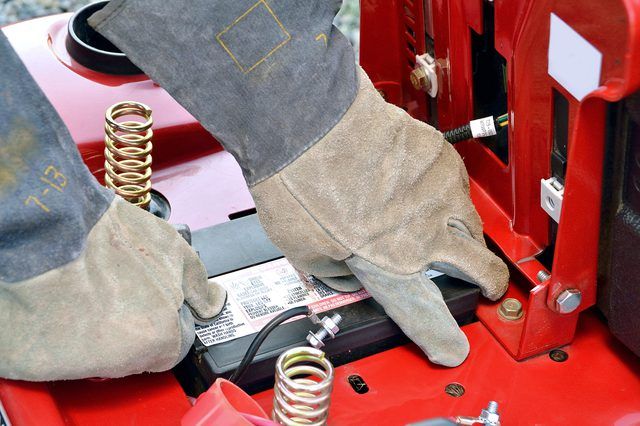
Put on work gloves, reach into the battery compartment and lift out the battery. Some batteries have a lifting strap. If one is present, grasp it with one hand and use the other hand to guide the battery as you lift it out of the mower. Set the battery on a sturdy table or workbench to perform the other storage steps.
Step 3
Clean the outside of the battery with a solution of 1/4 cup of baking soda dissolved in 6 quarts of clear water. Wet a rag in the solution and wipe down the outside of the battery. Use a soft bristle brush soaked in the baking soda solution to scrub the top of the battery. Be careful to not get the baking soda solution inside the battery. Allow it to stand for five minutes to thoroughly neutralize any acid residue. Wet another clean rag with clear water and wipe down the entire outside of the battery. Dry off the battery by wiping the entire outside with a clean, dry rag.
Step 4
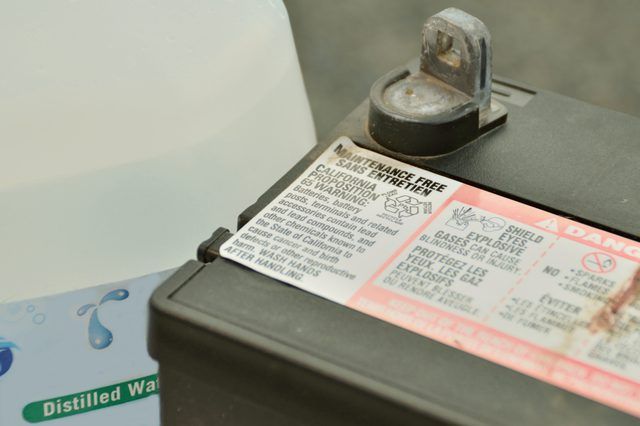
Check the fluid electrolyte level in the battery by unscrewing each battery cap and looking inside the hole. The fluid should completely cover the internal battery plates. Add distilled water if needed to bring up the fluid level. Do not use tap water. Sealed batteries don't have removable caps and their fluid level cannot be checked.
Step 5
Connect a 12-V battery charger to the battery by first connecting the clip of the red or positive cable to the positive post of the battery, which will be marked with a plus sign or the word "pos." Then connect the clip of the black or negative cable to the post marked with a minus sign or the word "neg."
Step 6
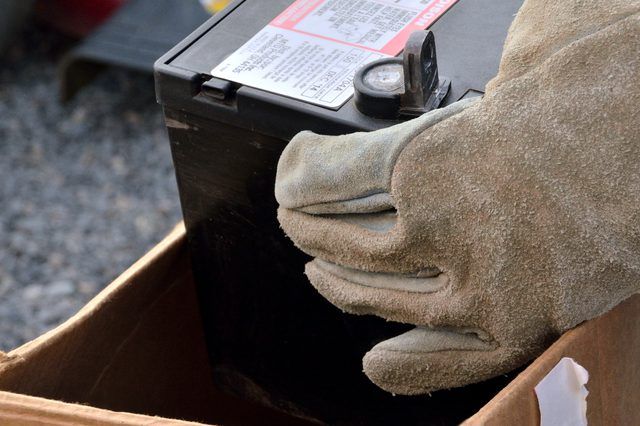
Plug in the charger and allow it to run overnight to fully charge the battery. If your charger has an amp meter, note the position of the meter�s needle when charging begins. The battery will be fully charged when the needle drops to about half the initial rate. For instance, if the initial charging rate is 12 amps, the battery will be fully charged when the needle drops to 6 amps. Disconnect the fully charged battery from the charger, put it in a strong cardboard box, close the box and set it on a sturdy shelf or other dry location in your garage or shed.


