Bulbs
Flower Basics
Flower Beds & Specialty Gardens
Flower Garden
Garden Furniture
Garden Gnomes
Garden Seeds
Garden Sheds
Garden Statues
Garden Tools & Supplies
Gardening Basics
Green & Organic
Groundcovers & Vines
Growing Annuals
Growing Basil
Growing Beans
Growing Berries
Growing Blueberries
Growing Cactus
Growing Corn
Growing Cotton
Growing Edibles
Growing Flowers
Growing Garlic
Growing Grapes
Growing Grass
Growing Herbs
Growing Jasmine
Growing Mint
Growing Mushrooms
Orchids
Growing Peanuts
Growing Perennials
Growing Plants
Growing Rosemary
Growing Roses
Growing Strawberries
Growing Sunflowers
Growing Thyme
Growing Tomatoes
Growing Tulips
Growing Vegetables
Herb Basics
Herb Garden
Indoor Growing
Landscaping Basics
Landscaping Patios
Landscaping Plants
Landscaping Shrubs
Landscaping Trees
Landscaping Walks & Pathways
Lawn Basics
Lawn Maintenance
Lawn Mowers
Lawn Ornaments
Lawn Planting
Lawn Tools
Outdoor Growing
Overall Landscape Planning
Pests, Weeds & Problems
Plant Basics
Rock Garden
Rose Garden
Shrubs
Soil
Specialty Gardens
Trees
Vegetable Garden
Yard Maintenance
How to Plant Biodegradable Paper Pots (or Pulp Pots)
How to Plant Biodegradable Paper Pots (or Pulp Pots). Many nurseries are selling trees and shrubs planted in pressed paper pots, also known as pulp pots, that are meant to be planted, pot and all, in the ground. The pressed fiber pots result in deeper rooting of plants, according to Washing State University's Garden Center Nursery Management...
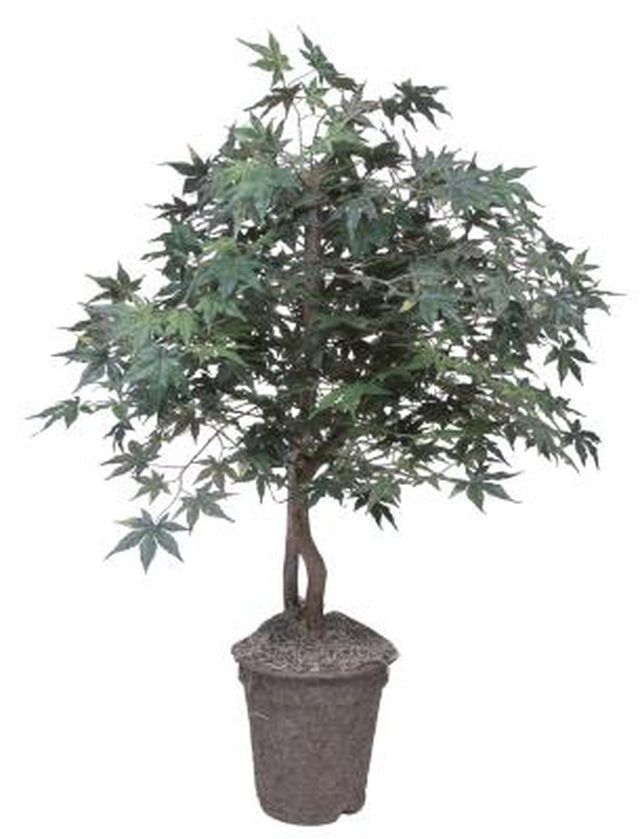
Many nurseries are selling trees and shrubs planted in pressed paper pots, also known as pulp pots, that are meant to be planted, pot and all, in the ground. The pressed fiber pots result in deeper rooting of plants, according to Washing State University's Garden Center Nursery Management program. As well, the environmental impact of using these biodegradable pots is a positive step in the nursery business. There are a few tricks to planting any plant that is grown in a paper fiber pot.
Things You'll Need
Utility knife
Shovel
Choose a location for your plant installation base on the sun and soil requirements of the plant in question. Dig the planting hole approximately twice as wide as the pot -- the wider the better, so the soil is loose and easy to root into -- and just as deep as the pot.
Cut away the lip of the pot with the utility knife, so the pot is the same height as the soil level. You don't want the lip of the pot to be above ground because it will act as a wick pulling moisture away from the roots. You never want the pot to be buried any deeper then the existing soil level and soil should never cover the flare where the trunk meets the roots or you risk suffocating the plant to death.
Lay the plant on its side and cut an "X" into the bottom of the pot so you cut all the way through and slightly into the roots and soil. Cut a vertical slice up the side of the pot, through to the soil, and on all four sides.
Set the entire pot in the planting hole. If your soil is dry, fill the planting hole up with water and then let it drain. Backfill with the native soil so the ground is even with the soil in the pot, the lip of the pot is under the soil and the trunk flare has no extra soil touching it or built up around it.
Water well. All new plantings need to be carefully monitored for water during the first two growing seasons.
Tips & Warnings
Amending the soil is always recommended, but you should amend the entire bed and not just the planting hole. If you make the soil in the planting hole so good and rich, the plant may never send its roots out into the native soil and the plant could essentially become root bound and suffer. Spread a 3-inch layer of compost over the entire bed and dig in before you dig your planting hole.
Careful with that sharp knife.


