Bulbs
Flower Basics
Flower Beds & Specialty Gardens
Flower Garden
Garden Furniture
Garden Gnomes
Garden Seeds
Garden Sheds
Garden Statues
Garden Tools & Supplies
Gardening Basics
Green & Organic
Groundcovers & Vines
Growing Annuals
Growing Basil
Growing Beans
Growing Berries
Growing Blueberries
Growing Cactus
Growing Corn
Growing Cotton
Growing Edibles
Growing Flowers
Growing Garlic
Growing Grapes
Growing Grass
Growing Herbs
Growing Jasmine
Growing Mint
Growing Mushrooms
Orchids
Growing Peanuts
Growing Perennials
Growing Plants
Growing Rosemary
Growing Roses
Growing Strawberries
Growing Sunflowers
Growing Thyme
Growing Tomatoes
Growing Tulips
Growing Vegetables
Herb Basics
Herb Garden
Indoor Growing
Landscaping Basics
Landscaping Patios
Landscaping Plants
Landscaping Shrubs
Landscaping Trees
Landscaping Walks & Pathways
Lawn Basics
Lawn Maintenance
Lawn Mowers
Lawn Ornaments
Lawn Planting
Lawn Tools
Outdoor Growing
Overall Landscape Planning
Pests, Weeds & Problems
Plant Basics
Rock Garden
Rose Garden
Shrubs
Soil
Specialty Gardens
Trees
Vegetable Garden
Yard Maintenance
How to Install Stamped Concrete
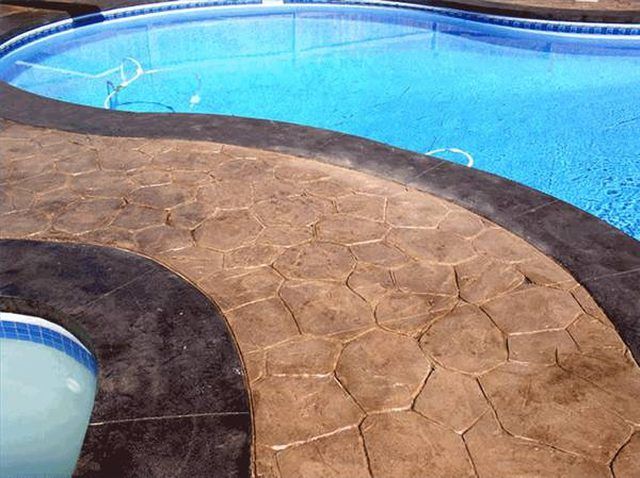
How to Install Stamped Concrete. Stamped concrete is a inexpensive alternative to stone or brick walkways when you don't have the resources to do a full rock pathway. The concrete can be stamped in designs that you like and can be colored to look many surfaces like brick, slate, cobblestones and even wood. Extensive walkways, patios, sidewalks and...

Stamped concrete is a inexpensive alternative to stone or brick walkways when you don't have the resources to do a full rock pathway. The concrete can be stamped in designs that you like and can be colored to look many surfaces like brick, slate, cobblestones and even wood. Extensive walkways, patios, sidewalks and even inside floors can be tackled by the homeowners in little sections at a time as you have the time and resources available.
Things You'll Need
Concrete mix
Stamp
Trowel
Coloring agent
Release agent
Wheelbarrow or concrete mixer
Stamper
Plan your design and color. You will need to find a source for your stamp, coloring agent and aggregate such as the one listed in the Resources section. Your local hardware store may have the supplies you need, saving you from paying for shipping. Concrete mix should be picked up locally. If you are planning on doing an overlay for an existing patio or sidewalk where a lot of mixing is required, a concrete mixer can be rented by the day.
Set the forms as if you were doing regular concrete work. Read the third link under Resources for a complete list of instructions for making a sidewalk mold, but stop before adding the concrete. You can do larger projects one section at a time.
Mix your concrete according to the directions on the packaging, being careful not to add too much water. Add your coloring agent and mix thoroughly either in a large wheelbarrow or in a concrete mixer. This can be quite a workout, so don't try to mix too much at one time, or it will start hardening before it is completely mixed. For larger projects, apply the color as a powder after the concrete has been poured.
Pour the treated concrete into the prepared mold and level with a long piece of board or a bull float. If your stamp pattern has low and high areas on it, it will help if the concrete is sloped very slightly to allow for water drainage and to prevent puddling. Advanced Surfaces Inc has a very good instructional video you can review if you are unsure of the whole process and want a visual overview of the project -- click the fourth link under Resources to check it out.
Dust the damp concrete with the release agent. This is similar to the process of dusting a cake pan with flour before adding the batter. It will keep the stamp from sticking to the concrete. The concrete should be hardening and able to take a bit of pressure without the object just sinking down.
Place the poly stamp right in the center of the area to be decorated, making sure it is square. Tamp it down by stepping on it to make a good impression, and then pull it straight up by the handles. Work in straight lines until the whole area has been stamped.
Allow the stamped concrete to dry or cure for a month before trying to seal it. It will need to be resealed every 18 months.