Bulbs
Flower Basics
Flower Beds & Specialty Gardens
Flower Garden
Garden Furniture
Garden Gnomes
Garden Seeds
Garden Sheds
Garden Statues
Garden Tools & Supplies
Gardening Basics
Green & Organic
Groundcovers & Vines
Growing Annuals
Growing Basil
Growing Beans
Growing Berries
Growing Blueberries
Growing Cactus
Growing Corn
Growing Cotton
Growing Edibles
Growing Flowers
Growing Garlic
Growing Grapes
Growing Grass
Growing Herbs
Growing Jasmine
Growing Mint
Growing Mushrooms
Orchids
Growing Peanuts
Growing Perennials
Growing Plants
Growing Rosemary
Growing Roses
Growing Strawberries
Growing Sunflowers
Growing Thyme
Growing Tomatoes
Growing Tulips
Growing Vegetables
Herb Basics
Herb Garden
Indoor Growing
Landscaping Basics
Landscaping Patios
Landscaping Plants
Landscaping Shrubs
Landscaping Trees
Landscaping Walks & Pathways
Lawn Basics
Lawn Maintenance
Lawn Mowers
Lawn Ornaments
Lawn Planting
Lawn Tools
Outdoor Growing
Overall Landscape Planning
Pests, Weeds & Problems
Plant Basics
Rock Garden
Rose Garden
Shrubs
Soil
Specialty Gardens
Trees
Vegetable Garden
Yard Maintenance
How to Plant Pyramidal Arborvitae as a Privacy Fence
How to Plant Pyramidal Arborvitae as a Privacy Fence. The pyramidal arborvitae (Thuja occidentalis "Pyramidalis") naturally develops a conical shape, so it requires little pruning to maintain a formal appearance. These dense evergreen shrubs grow in U.S. Department of Agriculture plant hardiness zones 3 through 8. Arborvitae work well as...
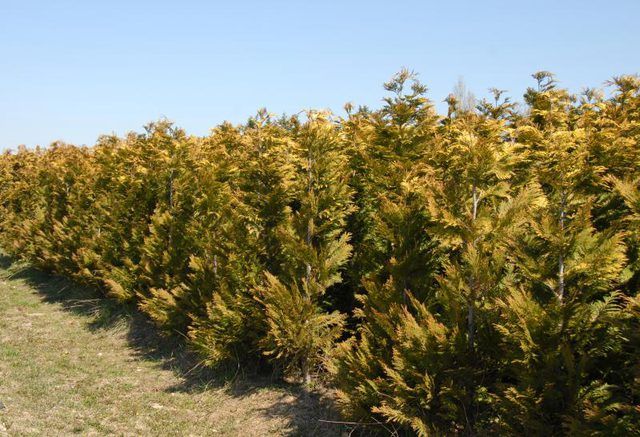
The pyramidal arborvitae (Thuja occidentalis "Pyramidalis") naturally develops a conical shape, so it requires little pruning to maintain a formal appearance. These dense evergreen shrubs grow in U.S. Department of Agriculture plant hardiness zones 3 through 8. Arborvitae work well as a living privacy fence and require only minimal maintenance when planted correctly. You can successfully plant arborvitae in any season.
Pick a Site
Arborvitae tolerate most soil types as long as they drain well. A site with rich soil that contains plenty of organic matter is best. Avoid areas with soggy or waterlogged soil. The trees perform better in full to partial sun. Heavy shade causes weak, sparse growth, making shady areas a poor choice for an arborvitae hedge. These shrubs are prone to winter browning, although it's usually only cosmetic and doesn't impact their health. Areas with drying winter winds are more likely to result in browned shrubs.
Spaced Out
A fully mature pyramidal arborvitae can grow 25 feet tall and up to 6 feet wide. But if you space them the way you're supposed to, you'll have empty spaces between the shrubs for several years, not secluded privacy. Offset planting helps make a denser barrier, but you need enough room for two rows of arborvitae. Space the rows at least 6 feet apart and plant the arborvitae at least 6 feet apart in each row. Offset the rows so the plants in the second row are set between two plants in the first row to provide privacy. If you have time to wait for the arborvitaes to fill out, or you have limited space, plant a single row and wait for a few years.
Time to Plant
Two options for planting hedges work well for arborvitae. Either dig an individual planting hole for each shrub, or dig a trench along the entire row. Trenches work well because you can make sure the arborvitae are evenly spaced and aligned properly. Dig the trench to the same depth as the nursery pots or root ball, but make it two or three times as wide. If the plants are in pots, remove them from the pots and set them in place in the trench. Check the roots for damage and trim off any dead or broken roots with a shears, after wiping the blades with a rubbing alcohol-soaked cloth to disinfect them. For balled-and-burlapped shrubs, set the wrapped root ball in place and fill the hole with one-third of the way up the side of the root ball. Cut the twine holding the burlap in place and remove any wire from around the roots, and then fold the burlap back. Fill in the hole halfway for both potted and wrapped roots, water, and then finish filling the hole before watering again. Make sure no burlap is protruding from the planting site.
Keep Them Growing
Weekly watering from spring through fall, especially after planting, keeps arborvitae healthy and encourages root establishment. They may not need additional water in heavily watered lawn areas, otherwise water deeply once or twice each week so the soil remains moist throughout the root zone but doesn't become muddy or waterlogged. Arborvitae don't require fertilization until the spring following planting. An application of a standard lawn fertilizer that doesn't container herbicides, such as a 32-0-4 blend, at the rate of 2 to 4 pounds per 100 square feet, supplies enough nutrients. Apply fertilizers to the soil, keeping the granules off the foliage and trunk, and water them in after application.


