Bulbs
Flower Basics
Flower Beds & Specialty Gardens
Flower Garden
Garden Furniture
Garden Gnomes
Garden Seeds
Garden Sheds
Garden Statues
Garden Tools & Supplies
Gardening Basics
Green & Organic
Groundcovers & Vines
Growing Annuals
Growing Basil
Growing Beans
Growing Berries
Growing Blueberries
Growing Cactus
Growing Corn
Growing Cotton
Growing Edibles
Growing Flowers
Growing Garlic
Growing Grapes
Growing Grass
Growing Herbs
Growing Jasmine
Growing Mint
Growing Mushrooms
Orchids
Growing Peanuts
Growing Perennials
Growing Plants
Growing Rosemary
Growing Roses
Growing Strawberries
Growing Sunflowers
Growing Thyme
Growing Tomatoes
Growing Tulips
Growing Vegetables
Herb Basics
Herb Garden
Indoor Growing
Landscaping Basics
Landscaping Patios
Landscaping Plants
Landscaping Shrubs
Landscaping Trees
Landscaping Walks & Pathways
Lawn Basics
Lawn Maintenance
Lawn Mowers
Lawn Ornaments
Lawn Planting
Lawn Tools
Outdoor Growing
Overall Landscape Planning
Pests, Weeds & Problems
Plant Basics
Rock Garden
Rose Garden
Shrubs
Soil
Specialty Gardens
Trees
Vegetable Garden
Yard Maintenance
How to Use Recycled Building Material to Build Raised Garden Beds
How to Use Recycled Building Material to Build Raised Garden Beds. Raised bed gardening eliminates many of the hassles of conventional row gardens as you can fill them with an ideal growing medium that is weed free. It's easier to plant, weed, water and harvest a raised bed garden. No wonder they are so popular! Since used hardwood pallets are...
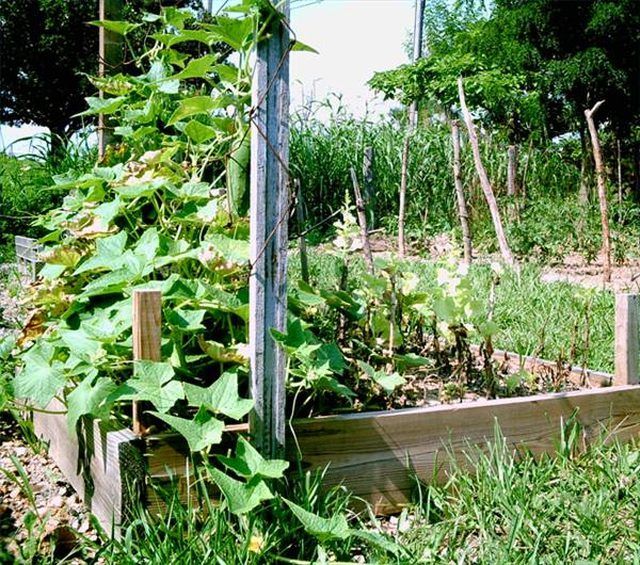
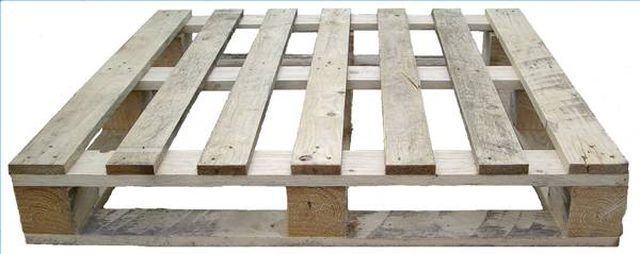
Raised bed gardening eliminates many of the hassles of conventional row gardens as you can fill them with an ideal growing medium that is weed free. It's easier to plant, weed, water and harvest a raised bed garden. No wonder they are so popular! Since used hardwood pallets are readily available, and can often be had for free, they are a great way to scrounge wood for use in raised beds. Here's a simple way to convert shipping pallets to useful and attractive raised beds.
Things You'll Need
12 2" x 3-1/4" x 4' Pallet slats
6' of 4" x 4" Post wood
Galvanized nails or screws
Saw (skilsaw, sawzall or jigsaw)
Extension cord
Hammer
Cats claw, pry bar, utility bar or crowbar
Work gloves
Protective eye wear
Tape measure
Pencil
Combination square
Compound miter saw
Nail gun or power drill
Building a Raised Bed From Pallets
Ask feed and pet supply stores, newspapers, grocers, home improvement stores, factories, builders and furniture stores for permission to take their empty pallets and any 4x4 lumber they have laying around.
Before hauling everything away, make sure the hardwood has not been pressure treated (insect and fungus treated wood will be green or yellow).
Break down pallets by separating slats from stringers while taking care not to damage the wood. You can do this by drilling out nail heads and prying or hammering the slats off the stringers or by using a sawzall, jigsaw or skilsaw to cut through the nails where they attach to the stringers.
Use a tape measure and compound miter saw to cut the 4x4 post material to the amount of 16 inch lengths needed for your raised beds.
Create a point on one end of each post by using a tape measure and combination square to draw a line around the circumference six inches up from an end and cutting at a 30 degree angle from this line to the end of the post on all four sides with your compound miter saw.
Align the long edge of two slats with the flat end of a post in a 90 degree butt joint and nail or screw them to the post.
Continue fastening the posts to the slats in the same way until you have a square frame with a post attached at each inside corner.
Lay the long edge of the next set of four slats against the first four and attach them to the posts in the same way.
Lay the long edge of the last set of four slats against the second set of four and fasten them to the posts.
You should end up with a four foot square frame with three slats on each side and a sharpened post extending below each inside corner.
Tips & Warnings
Cedar or cypress wood pallets are ideal since they are less prone to rotting.
Use nails for a quick and easy job or screws if you want stronger, longer-lasting joints.
Use a nail set instead of a nail punch to drive out embedded nails (a nail set is less likely to get stuck or bend).
A pair of vise grips can be clamped to a headless nail and pushed down to flip it out of the wood.
Tie a loose knot where the cord from your power tool is connected to your extension cord to avoid accidentally unplugging yourself.
Wear eye protection to protect yourself from flying debris.
Wear work gloves to protect your hands from splinters and sharp nails.
Wear a dust mask when you cut or sand pressure treated wood.
Never put your hand directly opposite a spot where you're nailing, screwing or cutting.


