Bulbs
Flower Basics
Flower Beds & Specialty Gardens
Flower Garden
Garden Furniture
Garden Gnomes
Garden Seeds
Garden Sheds
Garden Statues
Garden Tools & Supplies
Gardening Basics
Green & Organic
Groundcovers & Vines
Growing Annuals
Growing Basil
Growing Beans
Growing Berries
Growing Blueberries
Growing Cactus
Growing Corn
Growing Cotton
Growing Edibles
Growing Flowers
Growing Garlic
Growing Grapes
Growing Grass
Growing Herbs
Growing Jasmine
Growing Mint
Growing Mushrooms
Orchids
Growing Peanuts
Growing Perennials
Growing Plants
Growing Rosemary
Growing Roses
Growing Strawberries
Growing Sunflowers
Growing Thyme
Growing Tomatoes
Growing Tulips
Growing Vegetables
Herb Basics
Herb Garden
Indoor Growing
Landscaping Basics
Landscaping Patios
Landscaping Plants
Landscaping Shrubs
Landscaping Trees
Landscaping Walks & Pathways
Lawn Basics
Lawn Maintenance
Lawn Mowers
Lawn Ornaments
Lawn Planting
Lawn Tools
Outdoor Growing
Overall Landscape Planning
Pests, Weeds & Problems
Plant Basics
Rock Garden
Rose Garden
Shrubs
Soil
Specialty Gardens
Trees
Vegetable Garden
Yard Maintenance
How to Divide Shasta Daisy Plants
How to Divide Shasta Daisy Plants. Shasta daisies are an old-fashioned favorite in the garden. Both novice and experienced gardeners will easily grow a beautiful clump of shasta daisies in a sunny growing area that will return year after year to provide lovely summer blooms. As the years go by, shasta daisies will expand and many gardeners like to...
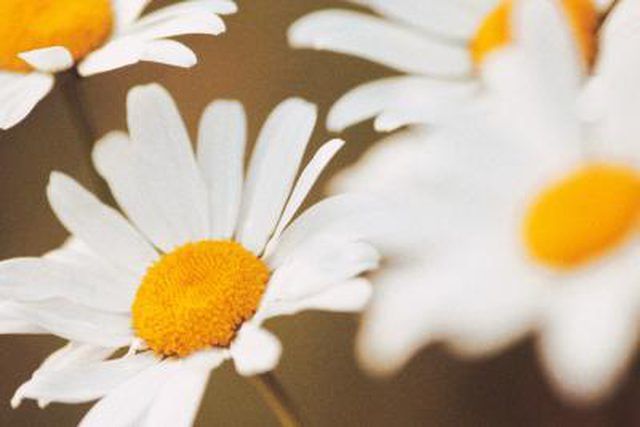
Shasta daisies are an old-fashioned favorite in the garden. Both novice and experienced gardeners will easily grow a beautiful clump of shasta daisies in a sunny growing area that will return year after year to provide lovely summer blooms. As the years go by, shasta daisies will expand and many gardeners like to divide them to create new shasta daisy plants. You can easily divide shasta daisy plants in the spring when they first sprout from the soil.
Things You'll Need
Shasta daisy plants
Shovel
Utility knife
Garden spade
Compost
Watch for the first growth of the shasta daisies in the spring. When you see this growth, dig with the shovel to remove the entire shasta daisy clump. Make sure you keep the roots intact as you remove the clump from the soil. Place the clump onto the ground nearby.
Use your hands or a utility knife to separate the outer portions of the plant (foliage and entire root systems together). As long as the divided portions of the clump have both foliage and roots, they should grow.
Examine the inner portions of the clump to see if there are any parts that appear old and woody. If you find portions like this, cut them out and discard them.
Prepare a new growing area by working the soil with the garden spade down to a depth of 8 inches. Add 2 inches of compost to the top of the soil to improve the soil composition and work this in well with the spade.
Dig holes for each shasta daisy plant that are 18 inches apart and deep enough to accommodate the root systems with the plants being at the same depth as they were previously growing.
Place the newly divided shasta daisy plants into the prepared holes and fill soil in around the roots. Tamp down the soil around the plants with your hands and provide a generous amount of water for each shasta daisy plant.


