Bulbs
Flower Basics
Flower Beds & Specialty Gardens
Flower Garden
Garden Furniture
Garden Gnomes
Garden Seeds
Garden Sheds
Garden Statues
Garden Tools & Supplies
Gardening Basics
Green & Organic
Groundcovers & Vines
Growing Annuals
Growing Basil
Growing Beans
Growing Berries
Growing Blueberries
Growing Cactus
Growing Corn
Growing Cotton
Growing Edibles
Growing Flowers
Growing Garlic
Growing Grapes
Growing Grass
Growing Herbs
Growing Jasmine
Growing Mint
Growing Mushrooms
Orchids
Growing Peanuts
Growing Perennials
Growing Plants
Growing Rosemary
Growing Roses
Growing Strawberries
Growing Sunflowers
Growing Thyme
Growing Tomatoes
Growing Tulips
Growing Vegetables
Herb Basics
Herb Garden
Indoor Growing
Landscaping Basics
Landscaping Patios
Landscaping Plants
Landscaping Shrubs
Landscaping Trees
Landscaping Walks & Pathways
Lawn Basics
Lawn Maintenance
Lawn Mowers
Lawn Ornaments
Lawn Planting
Lawn Tools
Outdoor Growing
Overall Landscape Planning
Pests, Weeds & Problems
Plant Basics
Rock Garden
Rose Garden
Shrubs
Soil
Specialty Gardens
Trees
Vegetable Garden
Yard Maintenance
How to Transplant Sedum Autumn Joy
How to Transplant Sedum Autumn Joy. If you despair about ever growing anything in a hot, rocky spot in your garden, then "Autumn Joy" sedum (*Sedum "Autumn Joy,"* *Sedum x "Autumn Joy" and *Sedum "Herbstfreude"*) may save your sanity. Hardy in U.S. Department of Agriculture plant hardiness zones 4 through 9...

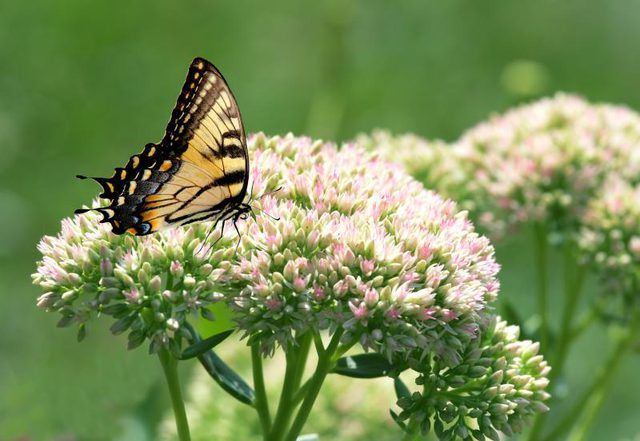
If you despair about ever growing anything in a hot, rocky spot in your garden, then "Autumn Joy" sedum (Sedum "Autumn Joy," Sedum x "Autumn Joy" and Sedum "Herbstfreude"*) may save your sanity. Hardy in U.S. Department of Agriculture plant hardiness zones 4 through 9 or zones 3 through 11, depending on the source, these perennials with gray-green leaves and flowers that change from white buds to dark pink, then bronze and finally copper are simple to transplant.
When to Divide and Transplant
Because sedum is a fall-bloomer, dividing and transplanting it in early spring -- as soon as the ground can be worked and the area's annual average last frost date has passed -- produces the best results and lessens the risk of transplant shock. If you start early enough for each divided root system to establish itself fully before the heat of summer, the risk of transplant shock is even lower. Pick an overcast day for transplanting. An overcast day when light rain is forecast for the following few days is even better.
How to Prepare the New Site
"Autumn Joy" sedum adapts to even the driest, rockiest soil, but a sandy, well-drained site in full sun helps it thrive. Turn up the new planting site's soil to a depth of about 15 inches to loosen it. Incorporate about a 3-inch-thick layer of compost in the loosened soil. Make each planting hole about twice the diameter of its future plant's root ball and about as deep as the plant's current growing space or container.
How to Dig Up and Divide the Plant
Water your "Autumn Joy' sedum the day before you plan to divide and transplant it. Damp soil makes it easier to remove the plant from the ground without exposing it to excessive trauma. Use a spading fork to loosen the soil on all sides of the "Autumn Joy," digging about 5 inches from the plant. Slip the fork underneath the plant, and use it to lift the whole plant out of the ground. Shake excess soil from the removed plant, and use a disinfected, sharp knife to separate its clumps if you want to divide the plant. Disinfect the knife before using it by wiping it with ethanol or isopropyl alcohol or by soaking it for 30 minutes in a solution of one part bleach to nine parts water.
How to Place the Sedum
Space each "Autumn Joy" plant about 6 inches from other plants, and place it in its prepared hole so that the top of the root ball is level with the surface of the surrounding soil. Press soil around each plant's roots firmly to eliminate air pockets, and water the plants' soil well.
During the first few weeks after planting, ensure the soil receives about 1 inch of water per week, supplementing rainfall as necessary. Once established, "Autumn Joy" is drought-resistant so doesn’t need frequent watering.