Bulbs
Flower Basics
Flower Beds & Specialty Gardens
Flower Garden
Garden Furniture
Garden Gnomes
Garden Seeds
Garden Sheds
Garden Statues
Garden Tools & Supplies
Gardening Basics
Green & Organic
Groundcovers & Vines
Growing Annuals
Growing Basil
Growing Beans
Growing Berries
Growing Blueberries
Growing Cactus
Growing Corn
Growing Cotton
Growing Edibles
Growing Flowers
Growing Garlic
Growing Grapes
Growing Grass
Growing Herbs
Growing Jasmine
Growing Mint
Growing Mushrooms
Orchids
Growing Peanuts
Growing Perennials
Growing Plants
Growing Rosemary
Growing Roses
Growing Strawberries
Growing Sunflowers
Growing Thyme
Growing Tomatoes
Growing Tulips
Growing Vegetables
Herb Basics
Herb Garden
Indoor Growing
Landscaping Basics
Landscaping Patios
Landscaping Plants
Landscaping Shrubs
Landscaping Trees
Landscaping Walks & Pathways
Lawn Basics
Lawn Maintenance
Lawn Mowers
Lawn Ornaments
Lawn Planting
Lawn Tools
Outdoor Growing
Overall Landscape Planning
Pests, Weeds & Problems
Plant Basics
Rock Garden
Rose Garden
Shrubs
Soil
Specialty Gardens
Trees
Vegetable Garden
Yard Maintenance
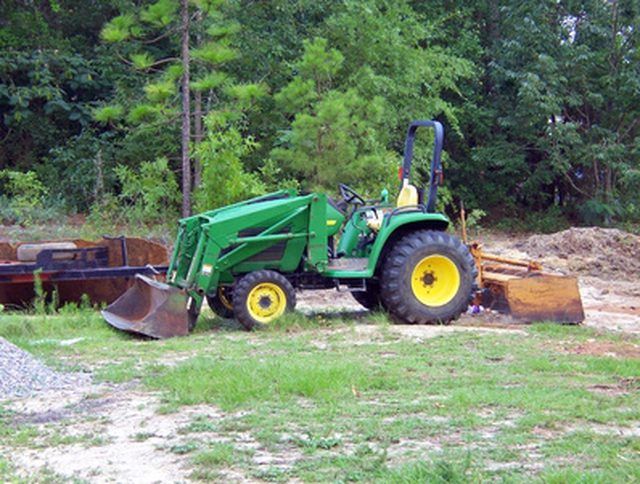
How to Attach a Loader to a John Deere Tractor
How to Attach a Loader to a John Deere Tractor. Virtually every model John Deere utility tractor produced from the 1950s forward has the option to add a loader. Many loader models--particularly those manufactured from the mid-1990s forward--are designed to attach to and remove from the tractor without tools in just a few minutes. Specific...

Virtually every model John Deere utility tractor produced from the 1950s forward has the option to add a loader. Many loader models--particularly those manufactured from the mid-1990s forward--are designed to attach to and remove from the tractor without tools in just a few minutes. Specific attachment instructions are included in the owner's manual that came with your loader, not with the tractor. If you don't have the owner's manual for your loader, it is available from John Deere Technical Publications. The instructions presented are based on a model 430 loader and a model 4410 tractor. They're representative of the basic design John Deere has used on its modern compact utility tractors. Use them as a general guideline unless you have this specific model.
Attach a weighted ballast box to the three-point hitch on the back of the tractor.
Examine the loader for damaged or missing parts, and clean the hydraulic fittings on both the tractor and the loader.
Rotate the latch plate retainer up so that it does not interfere with the latch plate during attachment. The latch plate retainer is located on the front weight bracket of the tractor.
Pull up and push forward on the loader latch, which is located on the left upper arm of the loader. The latch should already be in this position if the loader was parked properly, but confirm that the latch is in the open position.
Drive the tractor straight into the loader frame slowly and carefully. Proceed until the masts of the loader are closely aligned with the loader mounting frames on the tractor.
Shut the tractor off. Move the hydraulic control joystick back and forth and side to side a few times to relieve hydraulic pressure in the lines.
Connect the hydraulic hoses on the loader to the connection ports on the tractor. The hose and port dust caps are color coded to indicate which hose connects to which port. The color code is also printed on the coupler plate.
Start the tractor, and retract the lift cylinders slowly. The masts of the loader will lower onto the loader mounting frames on the tractor. It may be necessary to inch the tractor forward while doing this to keep the masts and frames aligned. Align the notches in the bottom of the masts with the tabs on the mounting frames.
Retract the lift cylinders completely, which will lift the front tires off the ground slightly and rotate the parking stand up and into the front weight bracket of the tractor.
Pull the latch handle on the upper left arm of the loader toward the operator's station on the tractor until it drops into the hole at the end of its slot. Turn the tractor off, and remove the key. Confirm that the latch plate is fully engaged on the front weight bracket.
Lower the latch plate retainer, and lock in place with a clevis pin and spring pin. Your loader is now safely mounted and ready for work.
Tips & Warnings
Read and follow all safety guidelines for using your tractor and loader. The safety instructions are found in the owner's manuals for the loader and tractor. If you do not have the owner's manuals, they're available from your John Deere dealer or from John Deere Technical Publications.