Bulbs
Flower Basics
Flower Beds & Specialty Gardens
Flower Garden
Garden Furniture
Garden Gnomes
Garden Seeds
Garden Sheds
Garden Statues
Garden Tools & Supplies
Gardening Basics
Green & Organic
Groundcovers & Vines
Growing Annuals
Growing Basil
Growing Beans
Growing Berries
Growing Blueberries
Growing Cactus
Growing Corn
Growing Cotton
Growing Edibles
Growing Flowers
Growing Garlic
Growing Grapes
Growing Grass
Growing Herbs
Growing Jasmine
Growing Mint
Growing Mushrooms
Orchids
Growing Peanuts
Growing Perennials
Growing Plants
Growing Rosemary
Growing Roses
Growing Strawberries
Growing Sunflowers
Growing Thyme
Growing Tomatoes
Growing Tulips
Growing Vegetables
Herb Basics
Herb Garden
Indoor Growing
Landscaping Basics
Landscaping Patios
Landscaping Plants
Landscaping Shrubs
Landscaping Trees
Landscaping Walks & Pathways
Lawn Basics
Lawn Maintenance
Lawn Mowers
Lawn Ornaments
Lawn Planting
Lawn Tools
Outdoor Growing
Overall Landscape Planning
Pests, Weeds & Problems
Plant Basics
Rock Garden
Rose Garden
Shrubs
Soil
Specialty Gardens
Trees
Vegetable Garden
Yard Maintenance
How to Build a Lawn Roller
How to Build a Lawn Roller. A lawn roller is a device that allows you to maintain a perfectly even cut from your lawn mower as you mow. Normally, the grass in your lawn lies in all different directions, which can result in an uneven cut from the lawn mower. A lawn roller is essentially a large heavy cylinder which rolls over the grass, causing the...
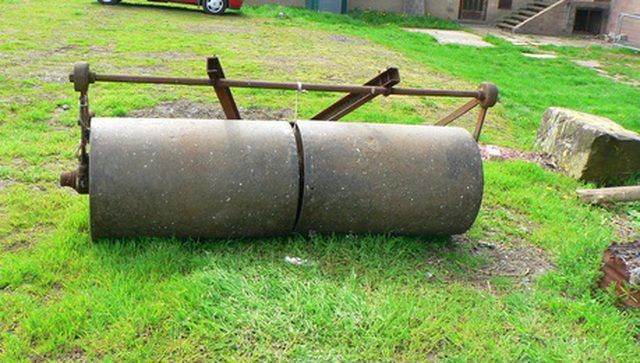
A lawn roller is a device that allows you to maintain a perfectly even cut from your lawn mower as you mow. Normally, the grass in your lawn lies in all different directions, which can result in an uneven cut from the lawn mower. A lawn roller is essentially a large heavy cylinder which rolls over the grass, causing the blades to align in the same direction. When the mower goes over these aligned blades, the cut is even and level. Commercially available lawn rollers range from cheap plastic models to expensive metal ones, but you can save money and get a high quality roller by constructing one yourself.
Things You'll Need
10-inch cardboard concrete building tube
Quick-drying cement mix
3/4-inch electrical conduit
1-inch electrical conduit
30-inch by 5/8-inch steel rod
Metal cutting wheel
Drafting compass
Plywood
Coping saw
Drill
Wood drilling bit to match thickness of U-bolts
Metal drilling bit to match thickness of straight bolts
2 U-bolts, 3-inch
3-inch straight bolts
Nuts and washers
1x2-inch lumber
Draw 10-inch circles on two pieces of plywood with your drafting compass and cut out the plywood with your coping saw.
Drill 3/4-inch holes in the center of each of your two plywood circles.
Cut the cardboard building tube to 24 inches.
Cut the 3/4-inch electrical conduit to 26 inches, and insert one end into one of the plywood tubes. Then put the cardboard tube over the conduit, which should stick out above the top of the tube by 1 inch or so. Make sure there is 1 inch of extra conduit on the other side, too, and leave that side sticking down into a dirt area or other soft outdoor surface so that the whole assembly stands up vertically.
Mix about 1.5 cubic feet of quick-drying concrete, and pour into the tube until it is full up to the top. Place the second plywood circle on the open top of the concrete tube, with the end of the conduit threaded through it, and press down until it is firmly seated in the end of the tube.
Allow the concrete to dry for 48 hours, and remove the cardboard and plywood from the concrete cylinder. You should now have a concrete cylinder 24 inches long and 10 inches in diameter with a 3/4-inch electrical conduit directly through the center, sticking out about 1 inch on each end of the cylinder.
Cut two 4-foot lengths of 1x2-inch lumber.
Pre-drill two holes through one end of each of your 4-foot lengths of wood (the holes should be drilled running through the 2-inch dimension of the wood, near one end), and insert the U-bolts into the holes, leaving a 3/4-inch eye on one side and securing the U-bolt with nuts and washers on the other side.
Insert the steel rod through the conduit in the center of the cylinder and through the U-bolt eyes on your pieces of wood. Mark where the rod comes out of the U-bolt eyes on each side.
Drill holes for straight bolts through the steel rod with your metal drilling bit.
Secure the straight bolts through the steel rod while the rod is in place through the cylinder and U-bolts. This will prevent the rod, which acts as the axle for your roller, from slipping out of the cylinder.
Bend a length of 1-inch electrical conduit to form the handle of your roller, and secure it to each of the pieces of wood with one or two bolts through the handle and wood.


