Bulbs
Flower Basics
Flower Beds & Specialty Gardens
Flower Garden
Garden Furniture
Garden Gnomes
Garden Seeds
Garden Sheds
Garden Statues
Garden Tools & Supplies
Gardening Basics
Green & Organic
Groundcovers & Vines
Growing Annuals
Growing Basil
Growing Beans
Growing Berries
Growing Blueberries
Growing Cactus
Growing Corn
Growing Cotton
Growing Edibles
Growing Flowers
Growing Garlic
Growing Grapes
Growing Grass
Growing Herbs
Growing Jasmine
Growing Mint
Growing Mushrooms
Orchids
Growing Peanuts
Growing Perennials
Growing Plants
Growing Rosemary
Growing Roses
Growing Strawberries
Growing Sunflowers
Growing Thyme
Growing Tomatoes
Growing Tulips
Growing Vegetables
Herb Basics
Herb Garden
Indoor Growing
Landscaping Basics
Landscaping Patios
Landscaping Plants
Landscaping Shrubs
Landscaping Trees
Landscaping Walks & Pathways
Lawn Basics
Lawn Maintenance
Lawn Mowers
Lawn Ornaments
Lawn Planting
Lawn Tools
Outdoor Growing
Overall Landscape Planning
Pests, Weeds & Problems
Plant Basics
Rock Garden
Rose Garden
Shrubs
Soil
Specialty Gardens
Trees
Vegetable Garden
Yard Maintenance
How to Plant Ranunculus Plants
How to Plant Ranunculus Plants. Ranunculus (Ranunculus asiaticus) are cool-weather loving, brightly colored summer blooming flowers that are grown from tubers. Also called Persian buttercup, ranunculus produce cup-shaped flowers with delicate petals that resemble crepe paper. Ranunculus prefer grown in a climate where winter is mild and spring is...
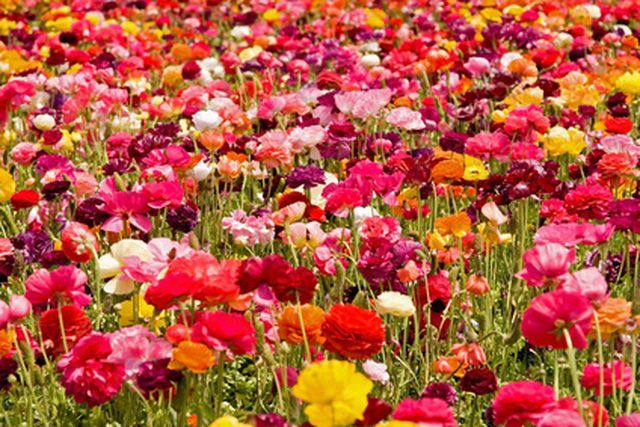
Ranunculus (Ranunculus asiaticus) are cool-weather loving, brightly colored summer blooming flowers that are grown from tubers. Also called Persian buttercup, ranunculus produce cup-shaped flowers with delicate petals that resemble crepe paper. Ranunculus prefer grown in a climate where winter is mild and spring is long and cool, according to the National Gardening Association. They are hardy in the USDA zones 8 to 11. In frost-free climates, plant ranunculus tubers in the fall, from October through November. In other climates, plant ranunculus about two to three weeks after the last spring frost is anticipated.
Things You'll Need
Ranunculus tubers
Shovel
Organic matter
Bowl
Trowel
Mulch
Locate a good planting spot for the ranunculus. The best location provides full sun, such as a spot that faces south or southwest.
Dig a hole, with the shovel, about 5 to 6 inches deep by the same width to test the drainage capabilities of the planting spot you have chosen. If the water has not fully drained back within one to two hours, you should create a raised planting bed.
Lay a 3- to 4-inch layer of organic matter across the topsoil in the spot you have selected for planting. Use compost, aged manure, ground bark or peat moss. Mix the organic matter down into the 8- to 10-inch layer of soil. If you need to create a raised bed, spread about 4 to 5 inches of organic matter across the topsoil. Mix it into the soil to a depth of about 6 to 8 inches. Then mound it up to create a 4- to 5-inch-high planting bed.
Soak the ranunculus tubers for about 15 to 20 minutes in a bowl that contains about 2 inches of water. Do not leave the tubers soaking for longer or they can begin to rot. Soaking the tubers will plump them up with water in case they have been overly dried out.
Dig holes in the planting spot that are approximately 2 inches deep and each is spaced between 8 to 12 inches apart, for the larger jumbo-sized tubers. Jumbo-sized tubers are about 2 3/4 to 3 1/8 inches in diameter. For other sizes, space each hole between 4 to 6 inches apart.
Plant one ranunculus tuber with the claw side down into each planting hole. Cover up each of the tubers with about 2 inches of soil.
Water the planting bed thoroughly using a slow stream or a steady fine spray of water. Refrain from watering again until about 15 to 20 days after planting since this is when you should start seeing the tubers sprouting.
Spread a 2 1/2- to 3-inch layer of straw, bark, grass clippings or leaves for mulch over the planting bed to reduce moisture loss and prevent weeds. Do this directly after planting.


