Bulbs
Flower Basics
Flower Beds & Specialty Gardens
Flower Garden
Garden Furniture
Garden Gnomes
Garden Seeds
Garden Sheds
Garden Statues
Garden Tools & Supplies
Gardening Basics
Green & Organic
Groundcovers & Vines
Growing Annuals
Growing Basil
Growing Beans
Growing Berries
Growing Blueberries
Growing Cactus
Growing Corn
Growing Cotton
Growing Edibles
Growing Flowers
Growing Garlic
Growing Grapes
Growing Grass
Growing Herbs
Growing Jasmine
Growing Mint
Growing Mushrooms
Orchids
Growing Peanuts
Growing Perennials
Growing Plants
Growing Rosemary
Growing Roses
Growing Strawberries
Growing Sunflowers
Growing Thyme
Growing Tomatoes
Growing Tulips
Growing Vegetables
Herb Basics
Herb Garden
Indoor Growing
Landscaping Basics
Landscaping Patios
Landscaping Plants
Landscaping Shrubs
Landscaping Trees
Landscaping Walks & Pathways
Lawn Basics
Lawn Maintenance
Lawn Mowers
Lawn Ornaments
Lawn Planting
Lawn Tools
Outdoor Growing
Overall Landscape Planning
Pests, Weeds & Problems
Plant Basics
Rock Garden
Rose Garden
Shrubs
Soil
Specialty Gardens
Trees
Vegetable Garden
Yard Maintenance
How to Harvest Home-Grown Barley
How to Harvest Home-Grown Barley. Barley is rarely grown in home gardens since it requires a lot of space to grow enough to make it worthwhile. Harvesting is also time-consuming, but a small barley patch is sometimes worthwhile, depending on its purpose. Use homegrown barley as animal feed, for home beer brewing or to experiment with grain...
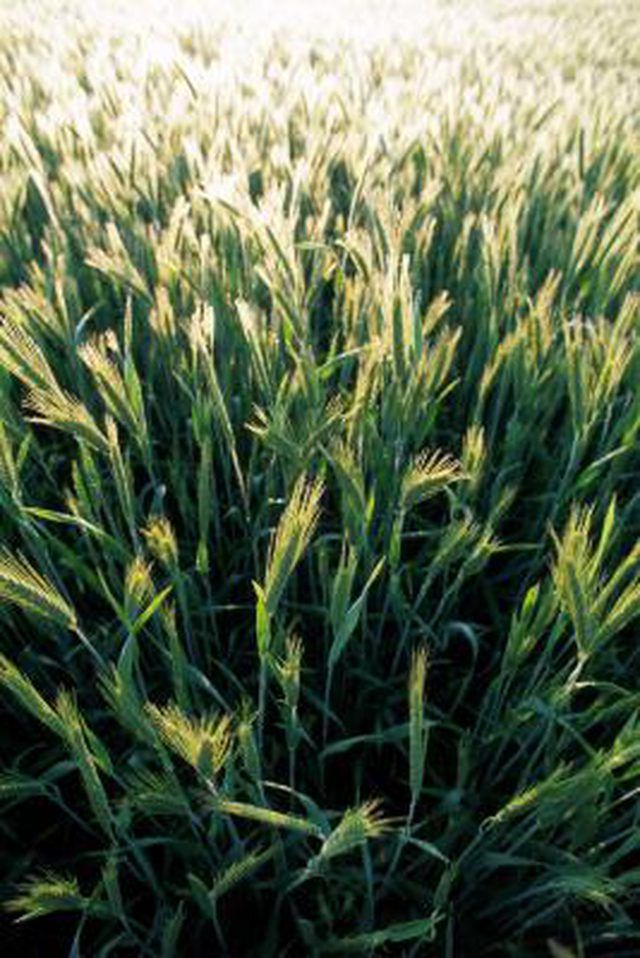
Barley is rarely grown in home gardens since it requires a lot of space to grow enough to make it worthwhile. Harvesting is also time-consuming, but a small barley patch is sometimes worthwhile, depending on its purpose. Use homegrown barley as animal feed, for home beer brewing or to experiment with grain production. It's necessary to harvest barley by hand since most home gardens don't have room for farm-harvesting equipment.
Things You'll Need
Knife
Tarp
Twine
Trash can
Tray or shallow bowl
Electric fan
Storage container
Grasp a handful of barley stalks just beneath the seed heads in your left hand (or your right if you're left-handed). Cut through the base of the stalks with a sharp knife.
Lay the barley stalks on a tarp with the seed heads facing one direction. Continue harvesting handfuls of stalks and laying them in the heap until all the barley is collected.
Gather a handful of barley stalks together into a bundle. Tie the bundle together with a length of sturdy twine. Repeat until all the barley is bundled and tied into sheaves.
Stand the sheaves upright with the seed heads at the top. Lean three or more sheaves together so the bundles stand upright on their own, resembling a tepee. Leave the sheaves to dry for three to five days, or until the barley kernels separate easily from the seed heads.
Hold a sheave of dry barley by the cut end of the stem. Insert the seed head into a large plastic or metal trash can. Beat the seed head against the sides of can so the barley seeds separate from the seed head, a process called "threshing." Repeat for each sheave.
Pour the barley seeds into a shallow tray or bowl. Place the bowl in front of an electric fan. Set the fan on the low setting, aiming it at the barley. Grasp the tray on either side and flip it so the barley lifts and resettles in the tray. The fan blows the chafe, or nonseed material, out of the tray so only seeds are left behind.
Store the barley in an airtight sealed container until you're ready to use it.
Tips & Warnings
Barley seeds are attached to hard inedible husks. Remove the husks, via a process called "pearling," by running handfuls of the seeds through the blender. Place the husked barley in a bowl of water, and scoop the husks from the water's surface as they rise.
You don't need to thresh or remove the chafe if you grow barley for animal feed.


