Bulbs
Flower Basics
Flower Beds & Specialty Gardens
Flower Garden
Garden Furniture
Garden Gnomes
Garden Seeds
Garden Sheds
Garden Statues
Garden Tools & Supplies
Gardening Basics
Green & Organic
Groundcovers & Vines
Growing Annuals
Growing Basil
Growing Beans
Growing Berries
Growing Blueberries
Growing Cactus
Growing Corn
Growing Cotton
Growing Edibles
Growing Flowers
Growing Garlic
Growing Grapes
Growing Grass
Growing Herbs
Growing Jasmine
Growing Mint
Growing Mushrooms
Orchids
Growing Peanuts
Growing Perennials
Growing Plants
Growing Rosemary
Growing Roses
Growing Strawberries
Growing Sunflowers
Growing Thyme
Growing Tomatoes
Growing Tulips
Growing Vegetables
Herb Basics
Herb Garden
Indoor Growing
Landscaping Basics
Landscaping Patios
Landscaping Plants
Landscaping Shrubs
Landscaping Trees
Landscaping Walks & Pathways
Lawn Basics
Lawn Maintenance
Lawn Mowers
Lawn Ornaments
Lawn Planting
Lawn Tools
Outdoor Growing
Overall Landscape Planning
Pests, Weeds & Problems
Plant Basics
Rock Garden
Rose Garden
Shrubs
Soil
Specialty Gardens
Trees
Vegetable Garden
Yard Maintenance
How to Make Stepping Stones From Scratch
How to Make Stepping Stones From Scratch. Instead of settling for the limited options available with premade stepping stones at the home store, make your own from scratch using cement and a mold form. Random household objects, repurposed materials or even sand and an existing stepping stone may be used to create the mold to set your vision in stone...
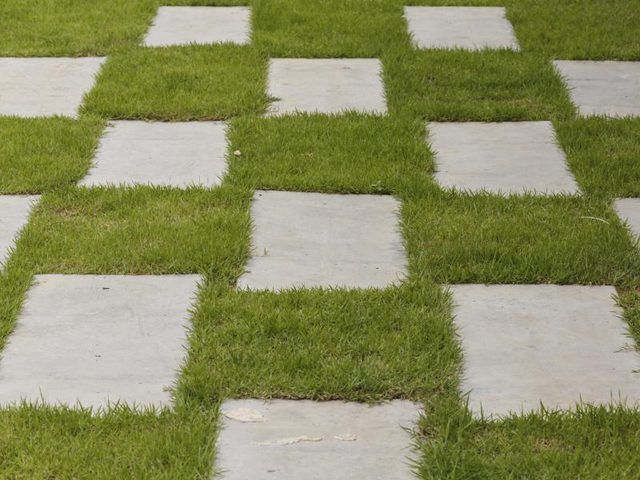
Instead of settling for the limited options available with premade stepping stones at the home store, make your own from scratch using cement and a mold form. Random household objects, repurposed materials or even sand and an existing stepping stone may be used to create the mold to set your vision in stone -- or rather, cement.
The Basic Process
Creating a cement stepping stone is as simple as finding a suitable mold form, lubricating or protecting the mold so the finished stepping stone slides out easily, and adding wet cement. Choose a sand-and-cement topping mix or a bag of premixed concrete, available from a home improvement store, and mix it in a bucket according to package directions. If using a hard mold that you wish to reuse, lubricate the inside of it with petroleum jelly, or coat it with plastic wrap and petroleum jelly or a light vegetable oil. Fill the mold to the desired depth with wet cement, then allow it to dry and cure for several days before gently flipping the mold over to release the stepping stone. An inch-thick stone is generally sturdy enough to support weight, while hard cement less than 1/2-inch thick may break relatively quickly under use if not set on completely level ground. Read the cement package for approximate drying times, as these may vary by brand or type of cement.
Reusable, Repurposed Mold Materials
All kinds of materials may be used as molds for stepping stones, from bucket lids to baking pans. The ideal mold has a flat bottom, such as a thrift-store round cake pan, otherwise either the top or bottom of your stepping stone will not be flat. Besides bucket lids and repurposed baking pans, other potential molds include plastic food-storage containers, sturdy cardboard boxes, storage tubs or even takeout food containers. Thin materials such as foam takeout containers may fall apart after using them once or twice. If you're making several stepping stones, it helps to have one mold for each stone on hand so you only have to mix one batch of cement.
Temporary Sand Molds
Sand serves as a mold form that requires no lubricant or release -- simply dig the stepping stone out once it is hard. Fill a plastic tub or cardboard box with several inches of clean play sand; if you wish to make more than one stepping stone at a time, select a container large enough to hold all the stones without any of them touching the next or use several containers, each filled with sand. Moisten the sand slightly, as if using it to make sand castles, and press a firm object such as an existing stone, paver or cake pan into the sand to make an impression approximately 1-inch-thick. Pour the mixed cement into the sand and allow it to harden completely before removing it. Wear a sturdy work glove to brush sand off the finished stone and smooth its edges, where necessary.
Embellished Creations
Customize your stepping stones by dressing them up with sea glass, smooth pebbles or mosaic tiles -- press the pieces gently into the top of the wet cement, face up, in the desired arrangement, where they will harden in place. To really plan out the design, use the bottom of the mold as the top of the stone -- set the objects in the bottom of the mold face up, press the sticky side of clear shelf paper atop the arranged pieces, then flip the contact paper over with all the embellishments intact and leave it in the mold as you pour in the cement. Once the stepping stone dries, remove the contact paper to reveal the design. For a simple natural means of decoration, press veined leaves into the top of the wet cement, then peel the leaves away.


