Bulbs
Flower Basics
Flower Beds & Specialty Gardens
Flower Garden
Garden Furniture
Garden Gnomes
Garden Seeds
Garden Sheds
Garden Statues
Garden Tools & Supplies
Gardening Basics
Green & Organic
Groundcovers & Vines
Growing Annuals
Growing Basil
Growing Beans
Growing Berries
Growing Blueberries
Growing Cactus
Growing Corn
Growing Cotton
Growing Edibles
Growing Flowers
Growing Garlic
Growing Grapes
Growing Grass
Growing Herbs
Growing Jasmine
Growing Mint
Growing Mushrooms
Orchids
Growing Peanuts
Growing Perennials
Growing Plants
Growing Rosemary
Growing Roses
Growing Strawberries
Growing Sunflowers
Growing Thyme
Growing Tomatoes
Growing Tulips
Growing Vegetables
Herb Basics
Herb Garden
Indoor Growing
Landscaping Basics
Landscaping Patios
Landscaping Plants
Landscaping Shrubs
Landscaping Trees
Landscaping Walks & Pathways
Lawn Basics
Lawn Maintenance
Lawn Mowers
Lawn Ornaments
Lawn Planting
Lawn Tools
Outdoor Growing
Overall Landscape Planning
Pests, Weeds & Problems
Plant Basics
Rock Garden
Rose Garden
Shrubs
Soil
Specialty Gardens
Trees
Vegetable Garden
Yard Maintenance
How to Grow Chives Indoors
How to Grow Chives Indoors. Among the easiest of herbs to grow outdoors in U.S. Department of Agriculture plant hardiness zones 4 through 8, chives (Allium schoenoprasum) have the same willingness to please indoors. Given a sunlit kitchen window, they'll produce fresh, grassy onion-infused leaves for months. To move garden chives indoors, simply...
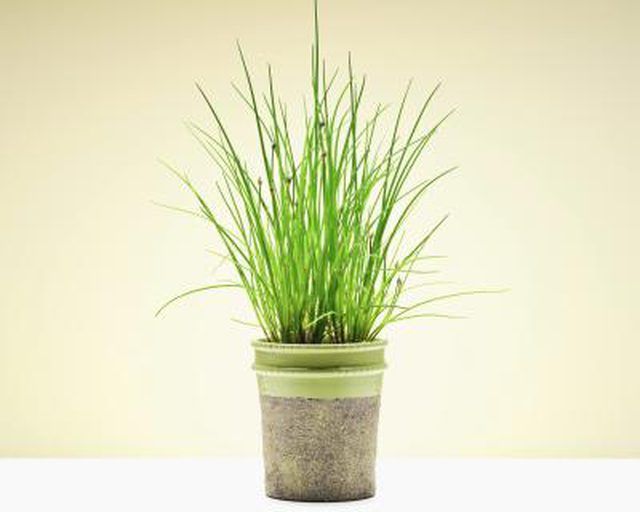
Among the easiest of herbs to grow outdoors in U.S. Department of Agriculture plant hardiness zones 4 through 8, chives (Allium schoenoprasum) have the same willingness to please indoors. Given a sunlit kitchen window, they'll produce fresh, grassy onion-infused leaves for months. To move garden chives indoors, simply divide and pot up a plant in fall. If you're an indoor-only gardener, look for started chive plants at a nursery or grocery store for the quickest harvest.
Things You'll Need
Insecticidal soap concentrate (optional)
Unglazed clay pots with drainage holes
Plastic, rubber or metal water saucers
Multipurpose compost
Water-soluble 20-20-20 fertilizer
Check garden chives for sap-sucking thrips before transferring them indoors. Silvery, mottled leaves indicate an infestation. The insects hide at the base of the plants where the foliage emerges from the bulbs. To suffocate them, mix 5 tablespoons, or the label's specified amount, of organic insecticidal soap concentrate per 1 gallon of soft water. Spray the plants thoroughly, making sure the soap penetrates the thrips' hiding places. Two follow-up sprays spaced a week apart may be needed to eliminate the pests.
Grow your chives in pots with drainage holes. Unglazed clay pots protect the plants from waterlogging by releasing moisture and allowing air to reach the roots. To keep water from damaging the surface beneath the pots, use plastic, metal or rubberized water saucers.
Fill the pots with multipurpose compost. Transfer the plants and water them well. Keep the chives outdoors until their foliage dies back. Then move them to your basement, garage or a similarly cool indoor location for two or three weeks. After they've acclimated to indoor life, place them in a south-, west- or east-facing window, or a room that receives at least four hours of daily sun.
Maintain the plants at a daytime temperature between 65 and 70 degrees Fahrenheit, and 10 degrees cooler at night. The goal is to mimic their outdoor growing environment as closely as possible, and chives won�t resent chilly nights in the 50-degree range.
Withhold water until mid-January, and then begin watering whenever the chives' growing medium feels dry to the touch. Soak the medium until water comes out of the drainage holes. They'll probably require more frequent water in summer than winter, but never overwater them.
Resume feeding when you start watering. Give the chives 20-20-20 water-soluble fertilizer every two weeks. Mix 3/4 teaspoon, or one-half the label's specified rate, per 1 gallon of water. Apply it after you've watered the plants, and let the soil dry just slightly. Continue as long as they're actively growing.
Repot when the chives begin losing vigor and their growing medium takes less and less time to dry. Lift them; carefully untangle their roots, and transfer them to larger pots of fresh multipurpose compost. Water them well and give them a few days to adjust out of direct sun before resuming their regular care.
Tips & Warnings
Indoor chives appreciate an occasional rinsing in the sink to remove dust.
The only diseases affecting chives, pink root and downy mildew, occur on plants growing in excessively wet medium or crowded conditions. Properly watering and spacing your chives at least 6 inches from other indoor herbs minimizes their risk of these ailments.
Indoor chives may stretch a bit in their quest to absorb as sunlight as possible, but that does nothing to diminish their pungent flavor.
If your winters are very cold, keep the chives from touching your window glass to protect them from damage.


