Bulbs
Flower Basics
Flower Beds & Specialty Gardens
Flower Garden
Garden Furniture
Garden Gnomes
Garden Seeds
Garden Sheds
Garden Statues
Garden Tools & Supplies
Gardening Basics
Green & Organic
Groundcovers & Vines
Growing Annuals
Growing Basil
Growing Beans
Growing Berries
Growing Blueberries
Growing Cactus
Growing Corn
Growing Cotton
Growing Edibles
Growing Flowers
Growing Garlic
Growing Grapes
Growing Grass
Growing Herbs
Growing Jasmine
Growing Mint
Growing Mushrooms
Orchids
Growing Peanuts
Growing Perennials
Growing Plants
Growing Rosemary
Growing Roses
Growing Strawberries
Growing Sunflowers
Growing Thyme
Growing Tomatoes
Growing Tulips
Growing Vegetables
Herb Basics
Herb Garden
Indoor Growing
Landscaping Basics
Landscaping Patios
Landscaping Plants
Landscaping Shrubs
Landscaping Trees
Landscaping Walks & Pathways
Lawn Basics
Lawn Maintenance
Lawn Mowers
Lawn Ornaments
Lawn Planting
Lawn Tools
Outdoor Growing
Overall Landscape Planning
Pests, Weeds & Problems
Plant Basics
Rock Garden
Rose Garden
Shrubs
Soil
Specialty Gardens
Trees
Vegetable Garden
Yard Maintenance
How to Grow Morel Mushrooms
How to Grow Morel Mushrooms. Morel mushrooms (Morchella spp.) are prized for their musky taste and distinctive texture and appearance. Although most morels available for sale were foraged from the wild, some mycologists -- people who study mushrooms and mushroom cultures professionally -- have tried to cultivate morels in an attempt to ensure a...

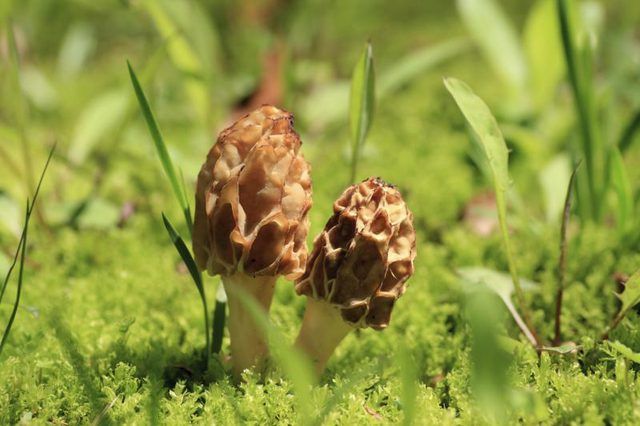
Morel mushrooms (Morchella spp.) are prized for their musky taste and distinctive texture and appearance. Although most morels available for sale were foraged from the wild, some mycologists -- people who study mushrooms and mushroom cultures professionally -- have tried to cultivate morels in an attempt to ensure a steady supply of them. Even though it is possible to cultivate morels, the process is not reliable and difficult to do. If your cultivation efforts work, however, you can expect a harvest in mid- to late spring.
Using a Morel Growing Kit
Morel growing kits, also known as spawn kits, are available year-round at specialty garden centers and from online distributors that specialize in mycology. Using a kit is among the easiest ways to grow morels at home because the spawn has been harvested and mixed with the substrate already. The kit only needs to be spread out in a prepared growing bed. Although the kits are often made with a mixture of sawdust, soil and other sterilized growing materials, some kits also come as young trees with inoculated roots. As the trees mature, the morels grow, much like they would in the wild.
Harvesting Your Own Spores
You can harvest your own morel spores and create the substrate yourself, but the process is tricky. Collect the spores by soaking a fresh morel in a container filled with a mixture of water, a small amount of molasses and a pinch of salt. You can use a foraged or purchased morel, but using a foraged morel is best because it is fresher. When foraging morels, be aware that it is simple to misidentify morels, and some false morels are poisonous. Do not harvest or use a mushroom unless you are sure it is an edible morel. After two days of soaking the morel, strain out the mushroom and all debris, saving only the liquid, which now contains morel spores. Pour the spore-filled liquid directly onto your prepared morel growing bed. Although less expensive than purchasing a growing kit, this method is not reliable because the spores must find a way into woody material before morels can take root. Increase your chances of a successful harvest by spreading a 1/2-inch-thick layer of compost and sawdust in a 1-to-1 ratio over the spore-filled morel growing bed to act as the casing layer -- a hardened layer of low-nutrient material that encourages mushroom formation.
Making the Mushroom Bed
Increase your chances of a morel harvest further by carefully preparing the growing bed in advance of growing the mushrooms. Place your growing bed in a shady area. Most kits will not cover more than a 4-by-4-foot space. Ensure the soil is sandy and well-draining. Remove all rocks and gravel from the bed, and remove all leaf litter from the bed's surface. Combine peat moss, gypsum and ashes from burnt wood in a 10-to-5-to-1 ratio to mimic morels' natural wild habitat, and add that blend to compost in a 1-to-1 ratio to ensure the soil will have a high nutritional content. Mix the compost-peat moss-gypsum-ashes blend and soaked wood chips into the growing bed's soil to a depth of at least 5 inches. Work the soil so that its top 2 inches are loose and not compacted. That preparation makes it easier for morels to grow and break through the soil's surface.
Taking Care of Mushrooms
After planting, taking care of the area will boost your chances of a successful morel harvest. Whether you harvested morel spores or they are from a growing kit, mix them with a small amount of soaked wood chips, sawdust and soil before you add the spores to the growing bed. That mixture allows for a more even distribution. After you introduce the spawn to the growing bed, gently smooth the bed's soil with a garden rake. Cover the growing bed with a 1/2-inch-thick layer of leaf litter to help preserve soil moisture and act as a casing layer. If, however, you used a casing soil layer after planting, then a roughly 1/4-inch-thick layer of leaf litter mulch will suffice.