Bulbs
Flower Basics
Flower Beds & Specialty Gardens
Flower Garden
Garden Furniture
Garden Gnomes
Garden Seeds
Garden Sheds
Garden Statues
Garden Tools & Supplies
Gardening Basics
Green & Organic
Groundcovers & Vines
Growing Annuals
Growing Basil
Growing Beans
Growing Berries
Growing Blueberries
Growing Cactus
Growing Corn
Growing Cotton
Growing Edibles
Growing Flowers
Growing Garlic
Growing Grapes
Growing Grass
Growing Herbs
Growing Jasmine
Growing Mint
Growing Mushrooms
Orchids
Growing Peanuts
Growing Perennials
Growing Plants
Growing Rosemary
Growing Roses
Growing Strawberries
Growing Sunflowers
Growing Thyme
Growing Tomatoes
Growing Tulips
Growing Vegetables
Herb Basics
Herb Garden
Indoor Growing
Landscaping Basics
Landscaping Patios
Landscaping Plants
Landscaping Shrubs
Landscaping Trees
Landscaping Walks & Pathways
Lawn Basics
Lawn Maintenance
Lawn Mowers
Lawn Ornaments
Lawn Planting
Lawn Tools
Outdoor Growing
Overall Landscape Planning
Pests, Weeds & Problems
Plant Basics
Rock Garden
Rose Garden
Shrubs
Soil
Specialty Gardens
Trees
Vegetable Garden
Yard Maintenance
How to Make a Homemade Mushroom Growing Box
How to Make a Homemade Mushroom Growing Box. Mushrooms go through three states to become the fungi you enjoy in various dishes. The first stage is the spawning stage, the second stage is the vegetative growth state and the third is the fruiting stage. The production of spawn is difficult and best left to professional mushroom growers. Obtain your...
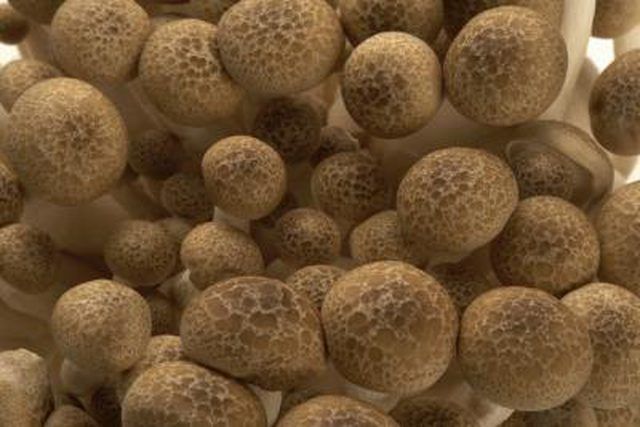
Mushrooms go through three states to become the fungi you enjoy in various dishes. The first stage is the spawning stage, the second stage is the vegetative growth state and the third is the fruiting stage. The production of spawn is difficult and best left to professional mushroom growers. Obtain your spawn from them after you've prepared your own mushroom growing box at home and seasoned the compost properly. If you do things right, in about eight weeks, you should see a crop of mushrooms in the final fruiting stage.
Things You'll Need
Rubber gloves
Roll of plastic sheeting
Scissors
Box tape
Plastic storage container, 20-qt. size
Thermometer
Organic compost
Mushroom spawn
Hand-held shovel
Hydrogen peroxide
Sphagnum moss
Put on a pair of rubber gloves before you begin. You want a mushroom-growing environment that is as sterile as possible to keep bacteria and pests from making their homes in your mushroom growing box.
Cut a piece from a roll of plastic sheeting to fit inside a 20-qt. plastic storage container. Pull the plastic tight inside the container, cover the sides and secure the plastic over the rim of the container with box tape.
Fill the container 2/3 full with organic compost. Measure the temperature of the compost. The temperature of the compost needs to be below 86 degree F to add the spawn.
Add the mushroom spawn and combine it evenly with the compost using your hands. If you decide to use a small shovel to add the spawn, you must sterilize the instrument first with hydrogen peroxide.
Place the container in a dark and moderately warm place where you can monitor the temperature and humidity level. Indirect light on the mushroom box is alright.
Check the box often for three to four days for mycelia growth. You will see a fibrous substance that is either gray or white making its way through the top of the compost. Wait about 10 days to allow the spawn to go through all of the compost before you apply the casing, or sphagnum moss.
Remove the sphagnum moss from its sterile packaging and moisten it with water. Cover the mycelia an even layer, 8 or 9 inches thick, with the sphagnum moss. This casing encourages the mycelia, or vegetative state, to convert to the fruiting state.
If you smell ammonia in the compost, do not add the mushroom spawn, as the mushrooms are not likely to grow in this medium. When ammonia is present, the compost is not complete.
After you harvest the first growth of mushrooms, additional crops will grow for up to a month.
Tips & Warnings
If you don�t have access to a soil test kit, check out your local university extension office. Some offices will test your soil for you.
If you can wait a year before planting your garden, grow a cover crop, such as alfalfa, in the garden plot. At the end of the growing season, you till the cover directly into the soil. This is known as green manure, and it provides many nutrients naturally that will allow you to build your garden.


