Bulbs
Flower Basics
Flower Beds & Specialty Gardens
Flower Garden
Garden Furniture
Garden Gnomes
Garden Seeds
Garden Sheds
Garden Statues
Garden Tools & Supplies
Gardening Basics
Green & Organic
Groundcovers & Vines
Growing Annuals
Growing Basil
Growing Beans
Growing Berries
Growing Blueberries
Growing Cactus
Growing Corn
Growing Cotton
Growing Edibles
Growing Flowers
Growing Garlic
Growing Grapes
Growing Grass
Growing Herbs
Growing Jasmine
Growing Mint
Growing Mushrooms
Orchids
Growing Peanuts
Growing Perennials
Growing Plants
Growing Rosemary
Growing Roses
Growing Strawberries
Growing Sunflowers
Growing Thyme
Growing Tomatoes
Growing Tulips
Growing Vegetables
Herb Basics
Herb Garden
Indoor Growing
Landscaping Basics
Landscaping Patios
Landscaping Plants
Landscaping Shrubs
Landscaping Trees
Landscaping Walks & Pathways
Lawn Basics
Lawn Maintenance
Lawn Mowers
Lawn Ornaments
Lawn Planting
Lawn Tools
Outdoor Growing
Overall Landscape Planning
Pests, Weeds & Problems
Plant Basics
Rock Garden
Rose Garden
Shrubs
Soil
Specialty Gardens
Trees
Vegetable Garden
Yard Maintenance
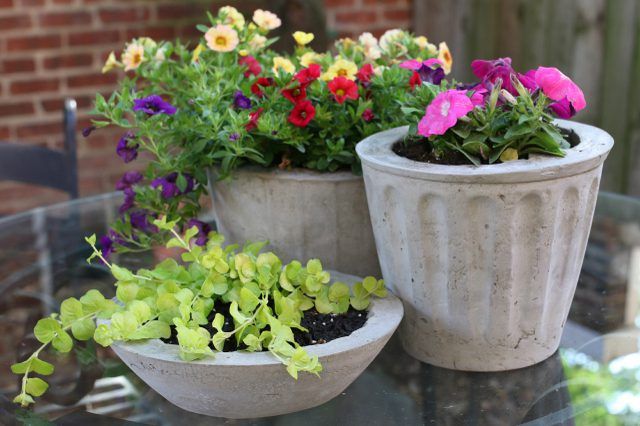
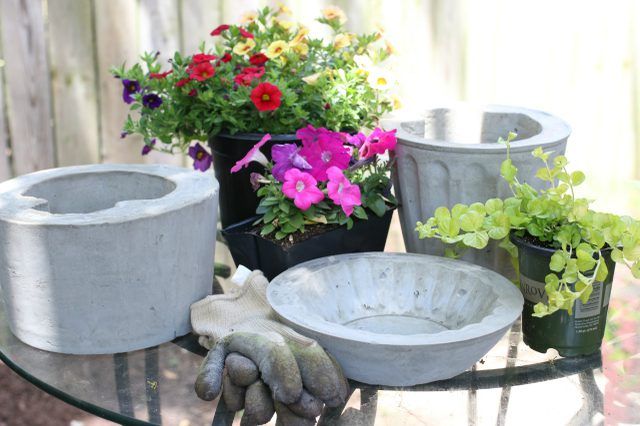
How to Make Concrete Flower Pots
Learn how to make modern-natural planters out of cement by using plastic containers in various shapes and sizes as molds.
Using minimal materials such as cement and household plastic containers, you can make modern, natural planters over the span of a weekend, resulting in a big decor impact for a budget-friendly price.
Things You'll Need
Portland cement
Plastic bowls, planters and other vessel forms
Cooking spray
Gallon mixing bucket
Garden hoe
Brick or other heavy object that fits inside the smaller container
Medium-grit sandpaper, for example #P60
Fresh plantings
Potting soil
Gardening trowel
*Portland cement can be found at most hardware stores; it is a smooth powdery consistency, which is commonly mixed with small stones and/or sand to make most types of concretes and mortars.
Plastic containers of different sizes and shapes will make the basic mold for each planter. You�ll need one larger container for the base and another smaller container to fit inside the first, which will make the planter cavity.
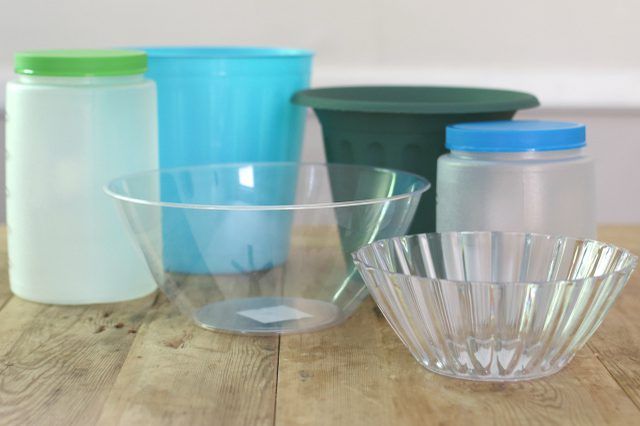
Look for everyday household containers to recycle from around your house, discarded plastic planters from local garden centers or single-use plastic serving bowls and buckets from the dollar store. Because the planter will take the shape of the original container, choose containers with patterns on the outside to add visual interest to the finished product.
Warning
Although the containers can be cleaned and reused after the molding process, do not consider them food-safe after this project.
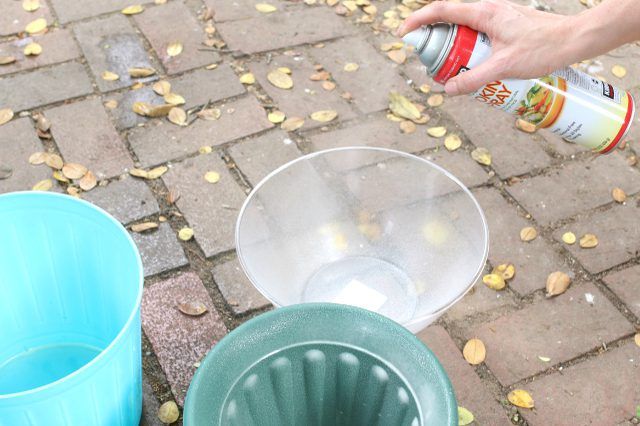
Coat inside of the base container with cooking spray. Doing so will help ease the process of removing the hardened and molded cement planter when it begins to dry.
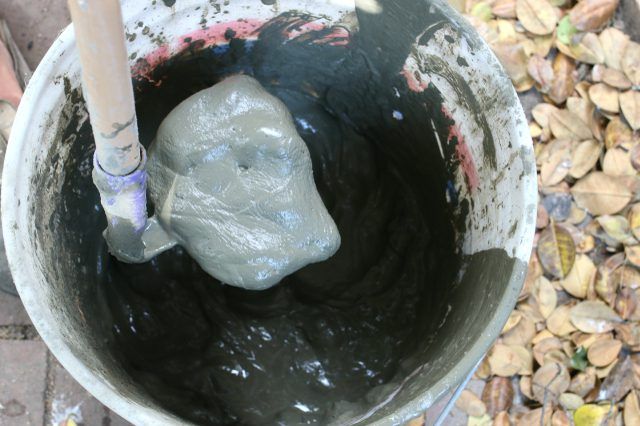
Mix a 1:2 ratio of water to cement in a gallon paint bucket and use a garden hoe to blend until the mixture reaches a uniform, workable consistency.
Tip
At this mixing stage, you could also mix in a concrete dye, if you prefer the look of terra cotta or another natural stone color.
Pour the cement mixture ? from the top of the larger base container. Work quickly, because the cement will begin to set within the next five to 10 minutes. Coat the outside of the second smaller container with cooking spray, and gently press it into the cement-filled container until the mixture rises to the top edges of the original container.
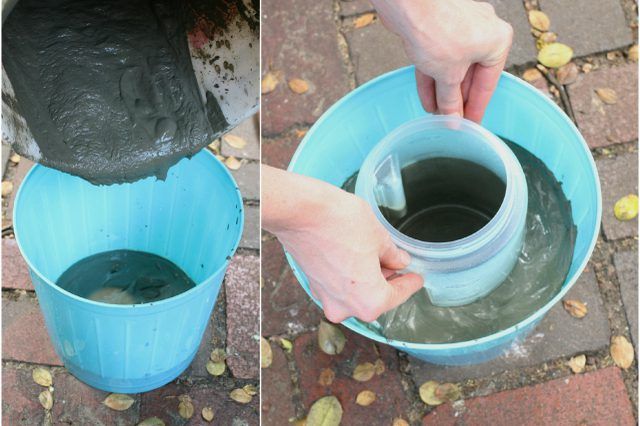
Use a brick or other heavy object to weigh the interior container down into the concrete mixture. Otherwise it will gradually float back up to the top during the drying process.
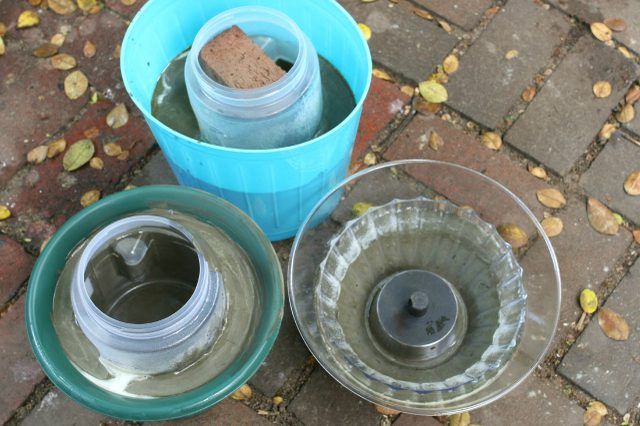
Allow the molded concrete to set up and dry overnight. When it's set and partially dried, pull the cement forms free from the container molds. Gently pull away the sides of the containers, wiggling back and forth if need be until the cement form slips free.
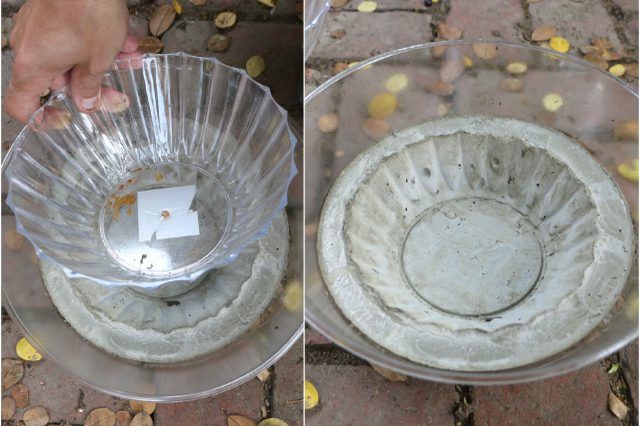
Allow the planters to continue fully drying, another two to three days, depending on the size of your planter. Larger forms will consequently have longer drying times.
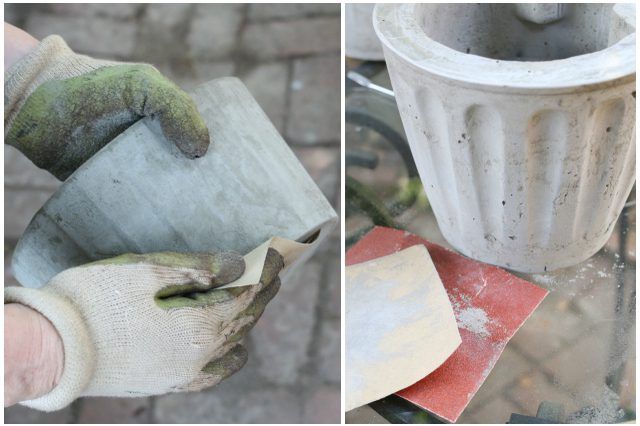
Smooth away any rough edges, bubbles or divots in the planter surface by rubbing with a piece of medium-grit sandpaper.
Because natural concrete is a porous surface, adding drain holes is an optional step at this stage. Drill through the bottom of each planter, using a masonry drill bit if doing so.
Tip
You could also apply a coat of decorative outdoor paint or concrete stain to vary up the natural look at this stage.
Plant fresh blooms, succulents or herbs in the concrete vessels, packing lightly with potting soil until supported and study.
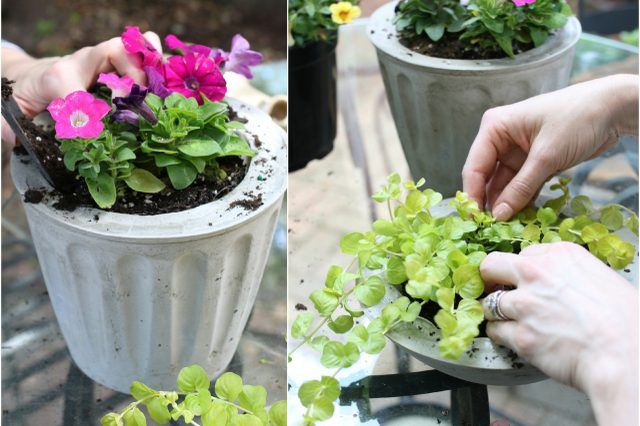
Water the newly potted plants, and allow them to sit in the sun while the they get used to their new environment.
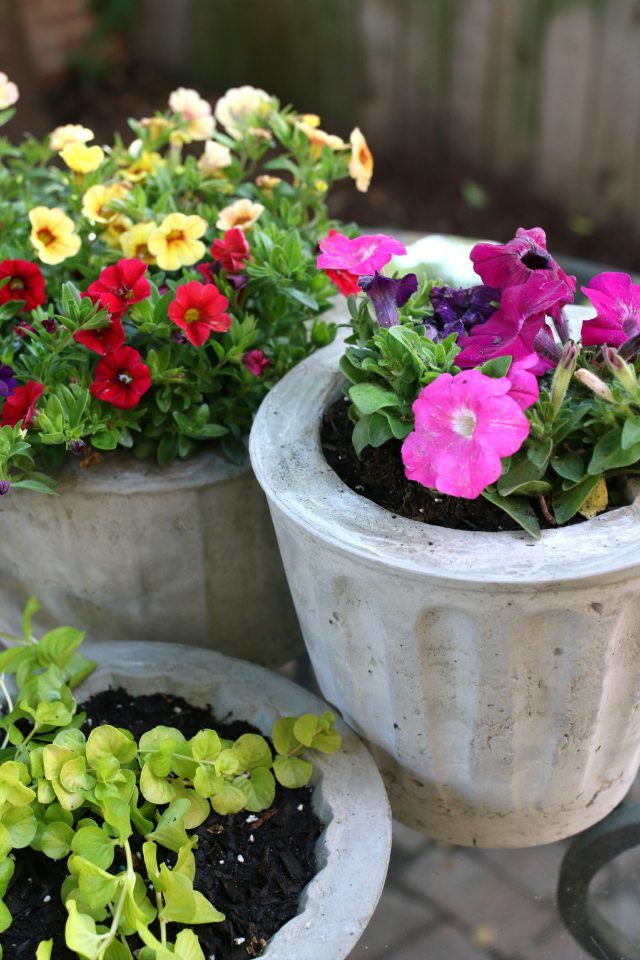
Use them to create a centerpiece on an outdoor table, arrange indoors to add natural charm to an empty corner or bring along to your next housewarming as a homemade gift, filled with modern character.
Looking for more project ideas? Learn how to dress up your clay pots with mosaics or make bunny-shaped planters from recycled cartons or these geometric concrete bookends.


