Bulbs
Flower Basics
Flower Beds & Specialty Gardens
Flower Garden
Garden Furniture
Garden Gnomes
Garden Seeds
Garden Sheds
Garden Statues
Garden Tools & Supplies
Gardening Basics
Green & Organic
Groundcovers & Vines
Growing Annuals
Growing Basil
Growing Beans
Growing Berries
Growing Blueberries
Growing Cactus
Growing Corn
Growing Cotton
Growing Edibles
Growing Flowers
Growing Garlic
Growing Grapes
Growing Grass
Growing Herbs
Growing Jasmine
Growing Mint
Growing Mushrooms
Orchids
Growing Peanuts
Growing Perennials
Growing Plants
Growing Rosemary
Growing Roses
Growing Strawberries
Growing Sunflowers
Growing Thyme
Growing Tomatoes
Growing Tulips
Growing Vegetables
Herb Basics
Herb Garden
Indoor Growing
Landscaping Basics
Landscaping Patios
Landscaping Plants
Landscaping Shrubs
Landscaping Trees
Landscaping Walks & Pathways
Lawn Basics
Lawn Maintenance
Lawn Mowers
Lawn Ornaments
Lawn Planting
Lawn Tools
Outdoor Growing
Overall Landscape Planning
Pests, Weeds & Problems
Plant Basics
Rock Garden
Rose Garden
Shrubs
Soil
Specialty Gardens
Trees
Vegetable Garden
Yard Maintenance
How to Build Raised Wooden Beds
How to Build Raised Wooden Beds. Raised garden beds are a productive way to grow vegetables and flowers and have several advantages over ground-level garden beds. More plants can be grown in a raised bed because it is not necessary to add extra space between rows. Soil compaction that reduces aeration and hinders root growth is eliminated because...

Raised garden beds are a productive way to grow vegetables and flowers and have several advantages over ground-level garden beds. More plants can be grown in a raised bed because it is not necessary to add extra space between rows. Soil compaction that reduces aeration and hinders root growth is eliminated because there is no foot traffic in the planting area. The type of soil that is used in a garden bed can be controlled, which reduces the amount of water and fertilizer needed to grow plants. Back injuries caused by bending and stooping are reduced when working in an elevated planting area.
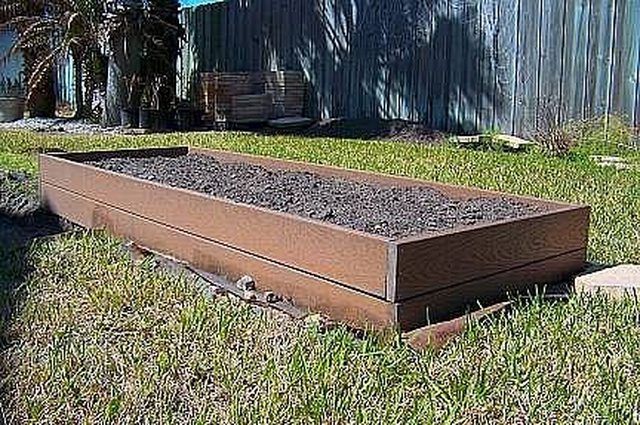
You can build a simple raised garden bed using wood boards that are nailed together at the corners. This article will show you how to put together a 4-by-8 foot raised bed that is 12 inches deep.
Things You'll Need
Lumber: 6 8-foot lengths or 4 12-foot lengths of 2-x-6 inch boards (select a rot-resistant wood such as red cedar, black locust, redwood or composite plastic lumber)
Fasteners: 24 3.5-inch galvanize
Cut the lumber. You will need four pieces of 8-foot lengths and four pieces of 4-foot lengths. If you are using lumber that is 8 feet long, cut two of the 8-foot lengths in half. If you are using lumber that is 12 feet long, cut four feet off of each piece of lumber. If you do not want to cut the wood yourself, ask the lumberyard to do the job for you.
Place lumber on a flat surface before assembling the box. Position the 8-foot boards perpendicular to the 4-foot boards. The boards should be flush together at the corners.

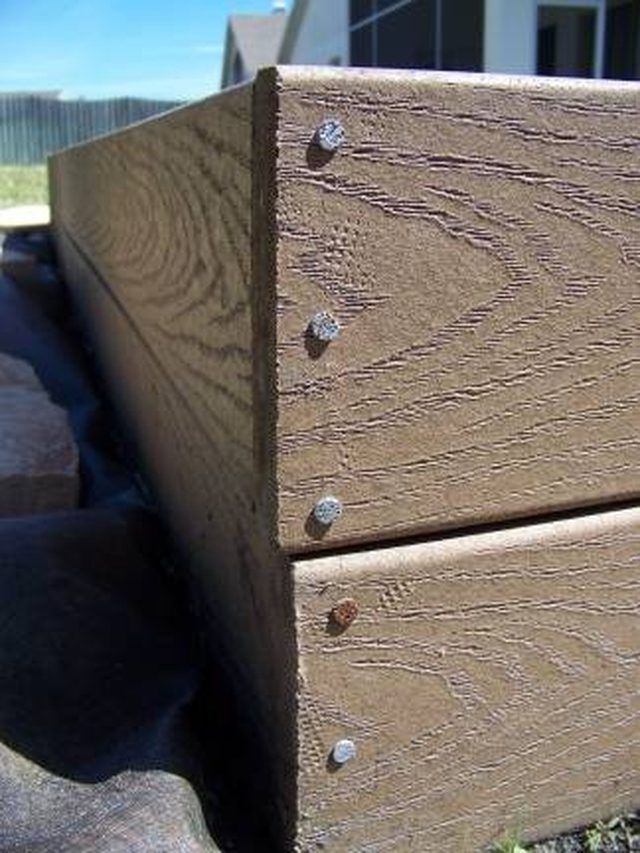
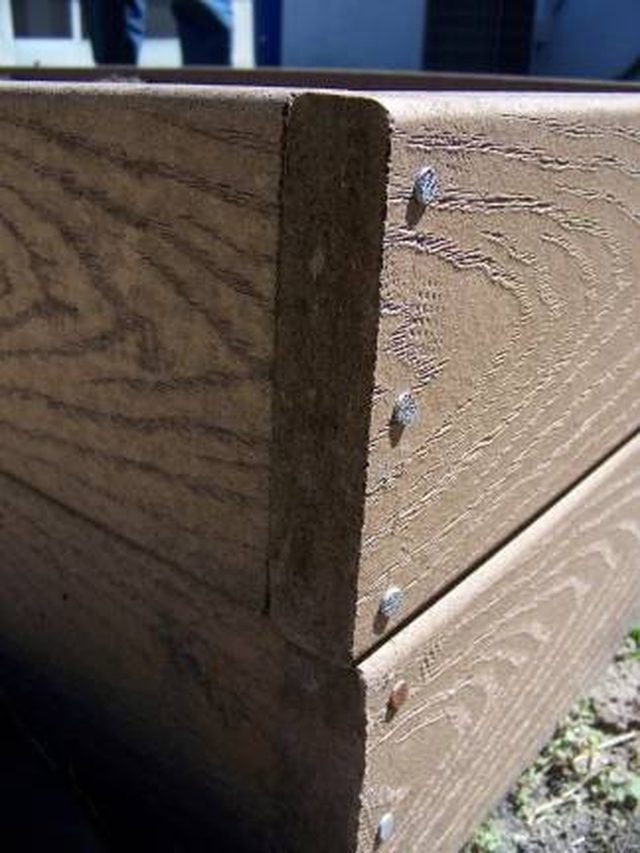
Pre-drill the holes for the butt joints. Line up the edges of the boards, hold the corners together and drill through the shorter piece and into the longer piece of lumber. Use clamps to keep the corners of the boards lined up while drilling the holes. Drill a hole in the top, center and the bottom of each corner. Pre-drilling prevents the lumber from splitting.
Fasten the corners with the nails. Hammer a nail into each of the holes that you drilled in step 3. Corner connectors and galvanized L brackets are alternative ways to fasten the boxes together.

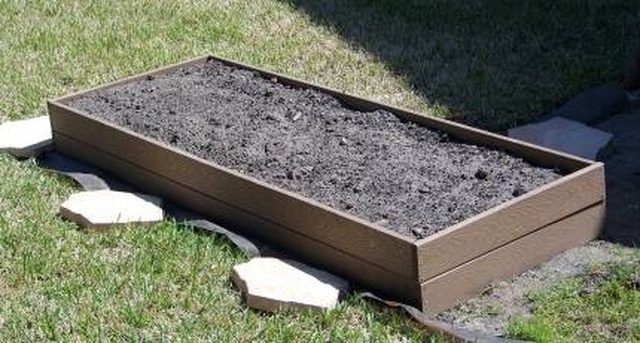
Find a spot in your garden for the raised bed. Pick a location that allows you to see the garden box from inside the house. Select a garden area that is accessible, flat and has access to a water source. Choose a sunny location that receives eight hours of sunlight every day.
Prepare the garden bed. Before filling the garden box with soil, remove weeds and grasses that are growing in the area. Also, loosen the ground where the garden box will be placed. After placing the garden box in the prepared area, fill it with soil. An all-purpose soil mix for a vegetable garden consists of two parts topsoil, one part compost and one part manure.

Tips & Warnings
A cap may be added along the top of the garden bed. The cap makes a comfortable place to sit while working in the garden bed.
Raised garden beds come in many shapes and sizes. When designing a garden bed, keep the garden bed about 4 feet wide. This makes it possible to work in the center of the bed from either side of the box.
Do not use treated lumber for raised garden beds. The chemicals used to treat the lumber may leach into the soil and vegetable crops.