Bulbs
Flower Basics
Flower Beds & Specialty Gardens
Flower Garden
Garden Furniture
Garden Gnomes
Garden Seeds
Garden Sheds
Garden Statues
Garden Tools & Supplies
Gardening Basics
Green & Organic
Groundcovers & Vines
Growing Annuals
Growing Basil
Growing Beans
Growing Berries
Growing Blueberries
Growing Cactus
Growing Corn
Growing Cotton
Growing Edibles
Growing Flowers
Growing Garlic
Growing Grapes
Growing Grass
Growing Herbs
Growing Jasmine
Growing Mint
Growing Mushrooms
Orchids
Growing Peanuts
Growing Perennials
Growing Plants
Growing Rosemary
Growing Roses
Growing Strawberries
Growing Sunflowers
Growing Thyme
Growing Tomatoes
Growing Tulips
Growing Vegetables
Herb Basics
Herb Garden
Indoor Growing
Landscaping Basics
Landscaping Patios
Landscaping Plants
Landscaping Shrubs
Landscaping Trees
Landscaping Walks & Pathways
Lawn Basics
Lawn Maintenance
Lawn Mowers
Lawn Ornaments
Lawn Planting
Lawn Tools
Outdoor Growing
Overall Landscape Planning
Pests, Weeds & Problems
Plant Basics
Rock Garden
Rose Garden
Shrubs
Soil
Specialty Gardens
Trees
Vegetable Garden
Yard Maintenance
How to Propagate 'Autumn Joy' Sedum
How to Propagate 'Autumn Joy' Sedum. Considered one of the top perennials for fall color, "Autumn Joy" sedum (Sedum x "Autumn Joy") grows in U.S. Department of Agriculture plant hardiness zones 5 through 9. Once you have one sedum, it's easy to make more by taking stem and leaf cuttings or dividing the plant. Because...
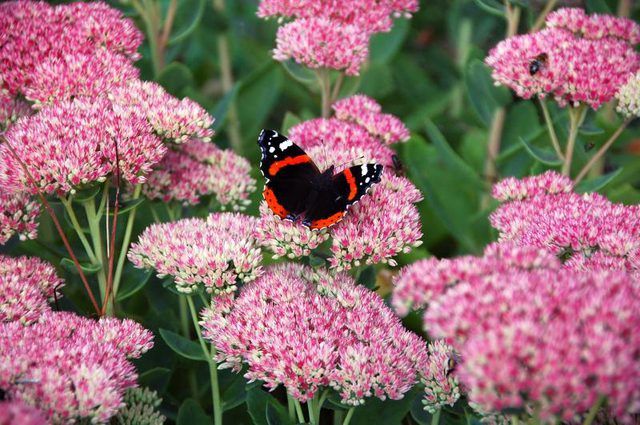
Considered one of the top perennials for fall color, "Autumn Joy" sedum (Sedum x "Autumn Joy") grows in U.S. Department of Agriculture plant hardiness zones 5 through 9. Once you have one sedum, it's easy to make more by taking stem and leaf cuttings or dividing the plant. Because "Autumn Joy" is a hybrid, seeds will not produce exact copies of the parent plant.
Cut Stems or Leaves
"Autumn Joy" sedum roots easily from stem or leaf cuttings. You can do this any time the plants are actively growing. Cuttings taken from new growth root more easily than cuttings from older stems.
Take cuttings in the early morning or late afternoon, and water the plants one hour before you take the cuttings. Make stem cuttings 2 to 6 inches long, with at least three sets of leaves. Cut the stem just below the node where a leaf joins the stem.
For leaf cuttings, remove the leaf along with the stalk that attaches the leaf to the stem. To keep them from drying out before planting, place stem and leaf cuttings in water or in a plastic bag with a damp paper towel.
Use sharp scissors or pruners to take the cuttings. Disinfect cutting tools by soaking them in a solution of 1 part bleach to 3 parts water for 5 minutes. Rinse them in clean water, and let them air-dry before use.
Plant Cuttings
Cuttings root best in a sterile, soilless potting mix. You can use a purchased seed-starting mix, or make your own for rooting cuttings by mixing equal parts river sand, perlite, and either vermiculite or peat moss. Use this mix to fill pots or planting trays with drainage holes. Water the potting mix so it is damp, and smooth the surface.
To avoid spreading disease, plant in new pots and planting trays or sterilize used pots before filling them with soil. Clean used pots and trays by scrubbing away any loose dirt, then soaking them in a solution of 1 part bleach to 9 parts water for 30 minutes. Wipe them dry before use. Always use pots and containers that have drainage holes.
For stem cuttings, use sterilized scissors or pruners to clip off the lowest set of leaves. If there are any flower buds on the cutting, remove those as well. Use a pencil to poke a hole in the potting mix, then place the cutting in the hole, firming the potting mix around the cutting so the place where you cut the leaves off is covered. For leaf cuttings, cover about 1/4 inch of the stem-end of the leaf with potting mix. There is no need to use a rooting hormone on "Autumn Joy" sedum cuttings.
Keep Them Moist
Cover the cuttings with clear plastic bags to help keep them from drying out. Some planting trays come with clear plastic domes which makes it easy to keep humidity levels high. The cuttings still need air circulation, though, so make sure there is space between the plastic and the pot or tray. Don't let the plastic touch the plant leaves.
Mist the cuttings as needed to keep the soil from drying out. You want the soil to stay moist, but not waterlogged. After two weeks, check if the stem cuttings are rooting by gently lifting the stem. If it comes free of the soil easily, replant it and check again in another week. Keep checking until the cuttings stay rooted in the soil when you gently tug at the stem.
You can tell leaf cuttings have rooted when new leaves start to emerge from the base of the leaf. Once the new stem or leaf cuttings have roots, gradually decrease the humidity by leaving the plastic off for several hours each day.
Move the Sedums Outside
The best time to plant new "Autumn Joy" sedum is in the spring after danger of frost has passed, but this plant is not picky about planting time. If you take cuttings in spring, the resulting plants can still be planted outdoors in the summer or fall. Mature plants reach 12 to 24 inches tall, and they should be spaced 12 to 18 inches apart.
A spot in full-sun is best, and "Autumn Joy" sedum will grow in any soil type as long as it drains well. Sedum is highly drought-tolerant, but water once a week for the first year if there is no rain. This encourages deep rooting.
Divide Established Plants
Once "Autumn Joy" sedum is established, divide the clumps every three to five years. This is an easy way to get new plants and to keep the sedum from becoming crowded. Divide the sedum in the spring, as soon as new growth starts to emerge from the soil. Choose an overcast day, preferably with light rain in the forecast. Water the plants the day before you plan to divide the plant.
Use a sharp spade to dig around the entire sedum clump, about 4 to 6 inches away from the base of the plant. Lift the entire clump, and shake off loose soil so you can see the root system better. Sedums form clumps, and you many need to use a sharp, large knife to divide the clump and cut through the roots. Sterilize this knife before use the same way you sterilized the pruning tools.
Replant the divisions as soon as possible. If you must delay planting, place the sedum in the shade and keep the soil moist. When you plant the new divisions, place them at the same depth they were previously growing. Firm the soil around the plants, and water thoroughly.


