Bulbs
Flower Basics
Flower Beds & Specialty Gardens
Flower Garden
Garden Furniture
Garden Gnomes
Garden Seeds
Garden Sheds
Garden Statues
Garden Tools & Supplies
Gardening Basics
Green & Organic
Groundcovers & Vines
Growing Annuals
Growing Basil
Growing Beans
Growing Berries
Growing Blueberries
Growing Cactus
Growing Corn
Growing Cotton
Growing Edibles
Growing Flowers
Growing Garlic
Growing Grapes
Growing Grass
Growing Herbs
Growing Jasmine
Growing Mint
Growing Mushrooms
Orchids
Growing Peanuts
Growing Perennials
Growing Plants
Growing Rosemary
Growing Roses
Growing Strawberries
Growing Sunflowers
Growing Thyme
Growing Tomatoes
Growing Tulips
Growing Vegetables
Herb Basics
Herb Garden
Indoor Growing
Landscaping Basics
Landscaping Patios
Landscaping Plants
Landscaping Shrubs
Landscaping Trees
Landscaping Walks & Pathways
Lawn Basics
Lawn Maintenance
Lawn Mowers
Lawn Ornaments
Lawn Planting
Lawn Tools
Outdoor Growing
Overall Landscape Planning
Pests, Weeds & Problems
Plant Basics
Rock Garden
Rose Garden
Shrubs
Soil
Specialty Gardens
Trees
Vegetable Garden
Yard Maintenance
How to Grow Protea From Cuttings
How to Grow Protea From Cuttings. With wide bracts ensconcing prodigious flowers, the peculiar petals of the genus Protea (Protea spp.) make propagation a profitable pastime for passionate gardeners. Originally from South Africa and Australia, proteas love the heat of U.S. Department of Agriculture plant hardiness zones 9 through 10. They thrive in...

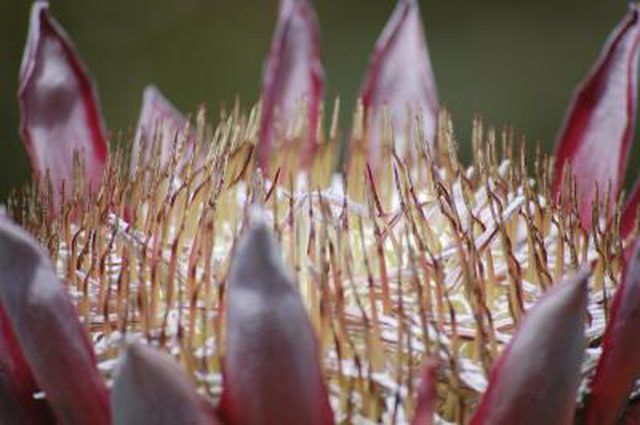
With wide bracts ensconcing prodigious flowers, the peculiar petals of the genus Protea (Protea spp.) make propagation a profitable pastime for passionate gardeners. Originally from South Africa and Australia, proteas love the heat of U.S. Department of Agriculture plant hardiness zones 9 through 10. They thrive in temperatures as high as 87 degrees Fahrenheit, as long as they get at least 27 inches of water a year, or 1/2 inch per week.
Starting Out
Start checking the donor protea's shoot development in December by bending a 5- or 6-inch-long cutting and looking for a clean break when it's bent -- it shouldn't crack dryly, but not with much pliability, either. Moist softwood cuttings invite rot, so dress all the cut tips with root hormone powder containing 0.1 percent indole-3-butyric acid, or IBA; you don't need much, just a light dusting to cover the wounds. Plant the cuttings in perforated plastic growing bags or a covered, sterile seedling tray filled with a mixture of equal parts peat moss and sterile sand.
Getting Established
Protea cuttings need unfiltered sunlight and a heating pad under the growing bag or seedling tray until you transplant them. Mist the proteas once an hour with distilled water from a spray bottle until you see new growth; after you see growth, keep the growing medium moist. It takes between six and 16 weeks for protea to develop roots strong enough to survive transplanting, but wait at least eight weeks before checking the strength of the roots by tugging the main stem. If you use clear growing bags, transplant the protea when you see new roots have formed and the thin starter roots have discolored.
A Bigger House
Transplanting newly rooted proteas into soil decreases their chance of survival. Instead, transplant the cuttings into a 1-quart pot with drainage holes, filled with 3 parts sterilized soil and 1 part sterilized sand. Loosen the medium around the protea cuttings using a wood skewer, and dig the root system out using a small spoon. Dig a hole about twice as wide as the root system and just as deep in the growing medium in the 1-quart pot. Tease out the roots gently with a skewer, and splay the roots in the hole. Backfill with the excavated medium, and water until the pot drains. Set the proteas outside in an area that receives full sunlight and keep the soil continuously moist to a depth of 1 inch.
A Permanent Home
The outdoor planting area for your proteas needs full sun exposure, and it must drain well. Cultivate the soil in the transplanting area 12 inches deep two to three months after transplanting the proteas to the 1-quart pot. If you have clay soil or otherwise poor-draining soil, work 6 inches of compost into the ground 12 inches deep. Protea plants don't do well in nitrogen-rich soil, so don't fertilize. If necessary, amend the soil to a pH between 5.0 and 6.0 a month or two before you transplant the cuttings.
Making the Move
Cease watering proteas one week before you transplant them in the ground. Dig a hole in the prepared transplant area 1 1/2 times the width of the 1-quart container. Slide the proteas out of the pot and gently tease out the roots by hand. Splay the roots in the bottom of the hole and backfill until the soil reaches the same level on the main stems as it did in the pot. Water at the base of the proteas with 1 quart of water, and keep the soil moist to a depth of 1 to 2 inches until you see new growth.