Bulbs
Flower Basics
Flower Beds & Specialty Gardens
Flower Garden
Garden Furniture
Garden Gnomes
Garden Seeds
Garden Sheds
Garden Statues
Garden Tools & Supplies
Gardening Basics
Green & Organic
Groundcovers & Vines
Growing Annuals
Growing Basil
Growing Beans
Growing Berries
Growing Blueberries
Growing Cactus
Growing Corn
Growing Cotton
Growing Edibles
Growing Flowers
Growing Garlic
Growing Grapes
Growing Grass
Growing Herbs
Growing Jasmine
Growing Mint
Growing Mushrooms
Orchids
Growing Peanuts
Growing Perennials
Growing Plants
Growing Rosemary
Growing Roses
Growing Strawberries
Growing Sunflowers
Growing Thyme
Growing Tomatoes
Growing Tulips
Growing Vegetables
Herb Basics
Herb Garden
Indoor Growing
Landscaping Basics
Landscaping Patios
Landscaping Plants
Landscaping Shrubs
Landscaping Trees
Landscaping Walks & Pathways
Lawn Basics
Lawn Maintenance
Lawn Mowers
Lawn Ornaments
Lawn Planting
Lawn Tools
Outdoor Growing
Overall Landscape Planning
Pests, Weeds & Problems
Plant Basics
Rock Garden
Rose Garden
Shrubs
Soil
Specialty Gardens
Trees
Vegetable Garden
Yard Maintenance
How to Grow Mushrooms With Rye Berries
How to Grow Mushrooms With Rye Berries. Growing mushrooms at home is an interesting hobby for any backyard enthusiast. Edible mushrooms can be grown on many different mediums, including used coffee grounds, but because rye berries do not tend to clump or cake as much as other berries such as rice or wheat, it is the preferred choice for mushroom...

Growing mushrooms at home is an interesting hobby for any backyard enthusiast. Edible mushrooms can be grown on many different mediums, including used coffee grounds, but because rye berries do not tend to clump or cake as much as other berries such as rice or wheat, it is the preferred choice for mushroom spawn production. It is also the least expensive medium, and is suitable to mycelial growth. Before rye berries can be used for mushroom cultivation, they must be heat pasteurized to eliminate any competing organisms and to prepare it for proper colonization.
Things You'll Need
One quart sized canning jar
Metal canning jar lid with seal
1 cup rye grain berries
1 1/2 cups water
Pressure cooker
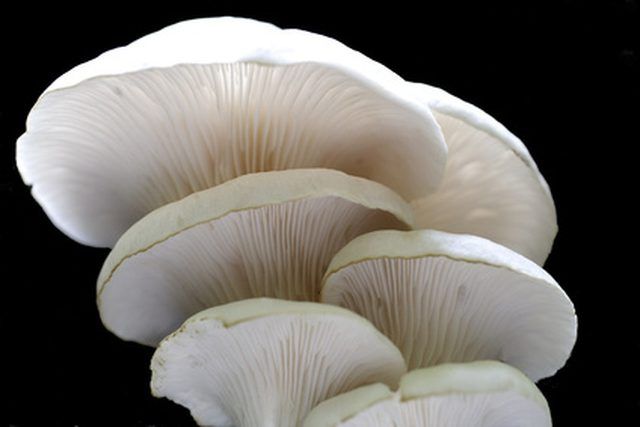
1 bunch fresh oyster mushrooms
Sterilized knife
Hardwood wood chip mulch
Prepare the area the mushrooms will be grown. An ideal location will be shady and moist, away from foot traffic, children and pets. Water the area well and then spread the hardwood chips out to a depth of at least 3 inches. Water the mulch lightly, preferably daily until moist but not wet. Continue to water often until the rye mushroom spawn is ready to be broadcast.
Measure one cup of rye grain seed into a one quart glass canning jar. Pour 3/4 cup water into the jar, mixing well to wet the grain. Cover the jar with the metal lid and tighten. Shake the jar to thoroughly mix the water and grain. Allow to rest overnight.
Remove the metal lid and drain any leftover water from the rye berries. Pour 3/4 cup of water into the glass jar. Invert the metal sealing insert from the canning lid so that the seal is facing up instead of down, place on top of the jar, and loosely screw the canning lid ring down over it. The goal is not to seal the jar, but to keep water out. Place the lightly sealed jar in the pressure cooker and fill with the appropriate amount of water for the cooker. Process at 15 psi for 90 minutes. Allow to cool.
Remove the tops from the mushrooms, reserving the bottom inch of stem and root and any clumps. Coarsely chop the stem, root and clumps with a clean knife. Mushrooms should be fresh and not have any decay or rotted parts. Remove the lid on the glass jar and put the chopped mushrooms in on top of the rye berries. Replace the lid and shake well to distribute. Place in a warm, dark location free from drafts that stays at about a 65-70 degree constant temperature. Make sure the lid is not sealed tight, to allow gas exchange in the glass jar.
Within 5 days, mycelium should be seen growing in the jar. It will look white and fuzzy, like mold. Give the jar a shake to mix the ingredients, and allow it to sit again for 5 days. Shake the jar once more and allow to sit an additional 5 days, after which time it should be fully innoculated with mycelium. Remove the lid from the jar and use a knife to break the cake that has formed into small pieces.
Rake away the surface of the prepared wood chip mulch and spread the rye grain pieces over the surface. Recover the grain with the removed mulch and water lightly. Continue to water daily until damp but not wet. Mushrooms should begin to start fruiting within a month, but may fruit earlier or later depending on conditions and location.
Tips & Warnings
Prior to handling any of the mushroom growing equipment, clean all work surfaces to kill any bacteria, mold or contaminants. Wash hands thoroughly throughout the process, and sterilize any tools used with rubbing alcohol.
If at any time anything begins growing in the rye berries that is not white, throw the whole batch away, as it is likely contaminated with another mold source.