Bulbs
Flower Basics
Flower Beds & Specialty Gardens
Flower Garden
Garden Furniture
Garden Gnomes
Garden Seeds
Garden Sheds
Garden Statues
Garden Tools & Supplies
Gardening Basics
Green & Organic
Groundcovers & Vines
Growing Annuals
Growing Basil
Growing Beans
Growing Berries
Growing Blueberries
Growing Cactus
Growing Corn
Growing Cotton
Growing Edibles
Growing Flowers
Growing Garlic
Growing Grapes
Growing Grass
Growing Herbs
Growing Jasmine
Growing Mint
Growing Mushrooms
Orchids
Growing Peanuts
Growing Perennials
Growing Plants
Growing Rosemary
Growing Roses
Growing Strawberries
Growing Sunflowers
Growing Thyme
Growing Tomatoes
Growing Tulips
Growing Vegetables
Herb Basics
Herb Garden
Indoor Growing
Landscaping Basics
Landscaping Patios
Landscaping Plants
Landscaping Shrubs
Landscaping Trees
Landscaping Walks & Pathways
Lawn Basics
Lawn Maintenance
Lawn Mowers
Lawn Ornaments
Lawn Planting
Lawn Tools
Outdoor Growing
Overall Landscape Planning
Pests, Weeds & Problems
Plant Basics
Rock Garden
Rose Garden
Shrubs
Soil
Specialty Gardens
Trees
Vegetable Garden
Yard Maintenance
Wooden Wishing Well Instructions
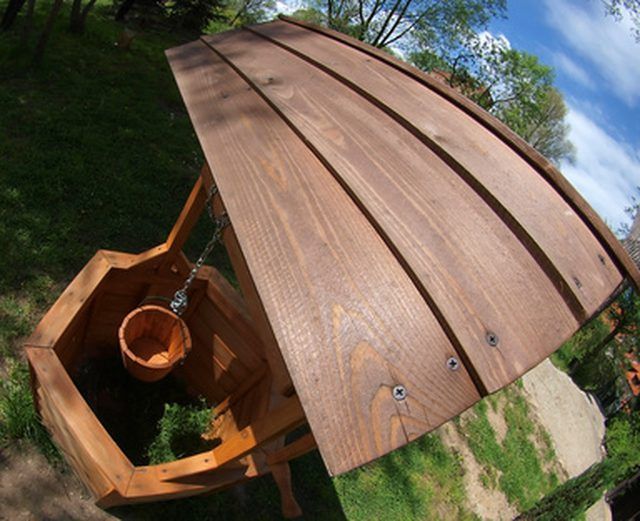
Wooden Wishing Well Instructions. Wooden wishing wells add fairy tale charm to your landscape. Their rustic appearance blends into any naturalized garden plan and completes an English garden or country cottage theme. A garden gnome peeking from behind the well or a resin-cast squirrel scampering along the crosspiece add humor and life to the scene.

Wooden wishing wells add fairy tale charm to your landscape. Their rustic appearance blends into any naturalized garden plan and completes an English garden or country cottage theme. A garden gnome peeking from behind the well or a resin-cast squirrel scampering along the crosspiece add humor and life to the scene.
Things You'll Need
111 rough-squared logs, 3-inch diameter, 12 feet long
Table saw
Drill press
5/16-inch diameter bit
6 dowel rods, 1/2-inch diameter, 4 feet long
Rubber mallet or coping saw
1 rough-squared log, 2- by 3-inch, 12 feet long
1 black ductile iron swing hanger with manufacturer's hardware
4 lag bolts, 6-inch long, 5/16-inch diameter
2 lag bolts, 5-inch long, 5/16-inch diameter
12-inch black steel chain, 2 "S" hooks
Cast iron cauldron with bail
Cut all the 3-inch diameter rough-cut logs to 2-foot lengths on your table saw.

Make 5/16-inch holes in each end of each 3-inch diameter log section, centered 1-inch from each end, using a drill press. These are the holes for the dowel rods that will hold the base of the well together.
Lay one of the 2-foot log sections so that its length runs from left to right in front of you. Lay a second and third piece, one leaning left and one right, as if making a disconnected triangle.
Place 1/2-inch diameter dowel rods in each end of each of the three log sections. Slide the next three log sections onto the rods to form a hexagon.
Adjust the positions of each log section until the hexagon is as regular as you can make it. Regular polygons have sides that are the same length and are set at the same interior angle to each other, according to Warren Buck, who teaches at the University Laboratory High School, University of llinois-Urbana. The distances between all opposite corners is also the same, if the shape has an even number of sides.

Continue sliding 3-inch diameter, 2-foot long log sections onto the dowel rods until all of them are connected at each end to form a hexagonal tube. This is the base of your wishing well.
Drive all the dowel rods into their holes with blows from a rubber mallet until they are flush with the top edge of the wishing well base or use a coping saw to cut them flush if you choose not to drive them into the ground. Driving them into the ground gives the base additional stability.
Cut the 2- by 3-inch rough-hewn log into three sections, 4-feet long. Stand one section upright in the right and left corners of the hexagon as it faces you. These are the uprights for the well.
Measure 6 inches and 10 inches from the top edge of the wishing well base. Drill two holes through the sides of the well base and into the uprights. Attach with 6-inch lag bolts. Lag bolts are long, thick screws with a square bolt head, once used to secure barrel staves, according to The Free Dictionary.
Find the center point of the 3rd section of 2- by 3-inch by 4-feet log. Screw the ductile iron swing hanger into the wood at that point, using manufacturer's hardware. This is your crosspiece for your wishing well.
Turn the crosspiece so that the swing hanger points at the ground. Position the crosspiece across the uprights with each end flush. Make a mark at each end of the crosspiece, 1.5 inches from each end, centered on the uprights.
Drill through the crosspiece at each mark, down into each upright. Screw a 5/16-inch diameter lag bolt into each hole.
Hang the black steel chain from the swivel using an "S" hook. Hang the cauldron from the other end of the chain, using the second "S" hook.