Bulbs
Flower Basics
Flower Beds & Specialty Gardens
Flower Garden
Garden Furniture
Garden Gnomes
Garden Seeds
Garden Sheds
Garden Statues
Garden Tools & Supplies
Gardening Basics
Green & Organic
Groundcovers & Vines
Growing Annuals
Growing Basil
Growing Beans
Growing Berries
Growing Blueberries
Growing Cactus
Growing Corn
Growing Cotton
Growing Edibles
Growing Flowers
Growing Garlic
Growing Grapes
Growing Grass
Growing Herbs
Growing Jasmine
Growing Mint
Growing Mushrooms
Orchids
Growing Peanuts
Growing Perennials
Growing Plants
Growing Rosemary
Growing Roses
Growing Strawberries
Growing Sunflowers
Growing Thyme
Growing Tomatoes
Growing Tulips
Growing Vegetables
Herb Basics
Herb Garden
Indoor Growing
Landscaping Basics
Landscaping Patios
Landscaping Plants
Landscaping Shrubs
Landscaping Trees
Landscaping Walks & Pathways
Lawn Basics
Lawn Maintenance
Lawn Mowers
Lawn Ornaments
Lawn Planting
Lawn Tools
Outdoor Growing
Overall Landscape Planning
Pests, Weeds & Problems
Plant Basics
Rock Garden
Rose Garden
Shrubs
Soil
Specialty Gardens
Trees
Vegetable Garden
Yard Maintenance
How to Lay Sod in Late Fall
How to Lay Sod in Late Fall. Laying sod is a quick and easy way to repair an already beautiful lawn or start a new one. Sod is pre-established grass seed, which gives it an advantage over regular grass seed because it can be laid with success later in the season. In fact, sod can be laid from early spring to late fall in most climates. However,...
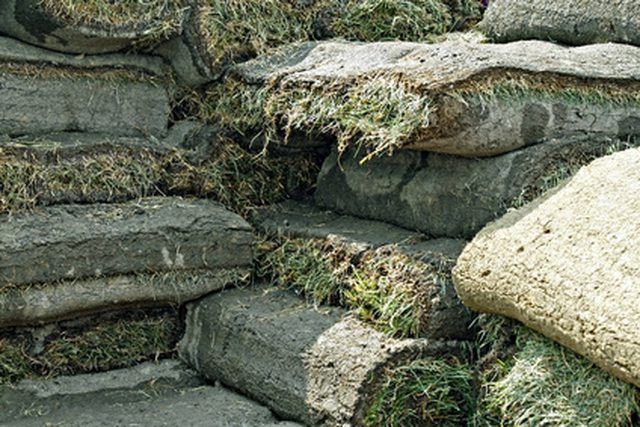
Laying sod is a quick and easy way to repair an already beautiful lawn or start a new one. Sod is pre-established grass seed, which gives it an advantage over regular grass seed because it can be laid with success later in the season. In fact, sod can be laid from early spring to late fall in most climates. However, laying sod in the late fall should be done in a way that helps the sod establish with the native soil before consistent freezes have a chance to decimate it.
Things You'll Need
Soil amendments
Starter fertilizer (1-2-1 or 3-4-1)
Metal rake
Rototiller
Sod cutter or shovel with sharp blade
Prepare the area you want to cover with sod by completely removing any existing turf or weeds down to the soil. Use your sod cutter or the blade of your shovel to aid you in removing existing plant material.
Use your Rototiller to loosen the top six to eight inches of the soil. Sod grows best when it has an aerated level of topsoil to root into, and this is especially important in the late fall where proper rooting is crucial to success.
Add soil amendments to correct any pH or nutrient deficiencies. Prudent installers should consider getting their soil tested to determine which nutrients are lacking. However, if soil testing is not an option, the sod installer can use certain rules of thumb for adding soil amendments to the topsoil. The University of Rhode Island Cooperative Extension suggests adding 50 pounds of dolomitic limestone for every 1,000 square feet to raise the pH of the soil to an acceptable level. Additionally, This Old House suggests adding two or three inches of finished compost to the soil to increase nutrient levels. Sand can also be useful for giving heavy clay soils the proper amount of drainage.
Spread starter fertilizer on the area. Starter fertilizer is a vital part of the process because it will help the sod establish in the native soil, thus improving the chance that it survives any periods of consistent freezing that are sure to come as the days pass. Unless your soil test indicates differently, mix one pound of nitrogen per 1,000 square feet of soil.
Use your metal rake to level the surface of topsoil. Be vigilant, and remove any rocks or stones in the topsoil as these can hinder the sod's ability to establish. Also, be conscious of drainage concerns and consider whether you should take corrective measures to establish better drainage for the area.
Moisten the topsoil using a hose or watering can. Sod establishes better when applied to a moist soil environment. This step is especially important if the late fall day is unusually warm or dry.
Carefully lay the sod onto the prepared soil and lightly water it. When the soil and sod have had a chance to dry out, lightly tamp or walk on it to ensure good contact between the sod and the topsoil.
Tips & Warnings
Water the sod only as frequently as needed to keep the soil moist. Over-watering can cause problems, including frost damage if the temperature drops significantly.
Follow all package directions when handling fertilizer.


