Bulbs
Flower Basics
Flower Beds & Specialty Gardens
Flower Garden
Garden Furniture
Garden Gnomes
Garden Seeds
Garden Sheds
Garden Statues
Garden Tools & Supplies
Gardening Basics
Green & Organic
Groundcovers & Vines
Growing Annuals
Growing Basil
Growing Beans
Growing Berries
Growing Blueberries
Growing Cactus
Growing Corn
Growing Cotton
Growing Edibles
Growing Flowers
Growing Garlic
Growing Grapes
Growing Grass
Growing Herbs
Growing Jasmine
Growing Mint
Growing Mushrooms
Orchids
Growing Peanuts
Growing Perennials
Growing Plants
Growing Rosemary
Growing Roses
Growing Strawberries
Growing Sunflowers
Growing Thyme
Growing Tomatoes
Growing Tulips
Growing Vegetables
Herb Basics
Herb Garden
Indoor Growing
Landscaping Basics
Landscaping Patios
Landscaping Plants
Landscaping Shrubs
Landscaping Trees
Landscaping Walks & Pathways
Lawn Basics
Lawn Maintenance
Lawn Mowers
Lawn Ornaments
Lawn Planting
Lawn Tools
Outdoor Growing
Overall Landscape Planning
Pests, Weeds & Problems
Plant Basics
Rock Garden
Rose Garden
Shrubs
Soil
Specialty Gardens
Trees
Vegetable Garden
Yard Maintenance
How to Lay Natural Stone Paving
How to Lay Natural Stone Paving. To offset the expense of buying cut paving stones, many homeowners choose natural stone paving for outdoor surfaces like driveways, paths and patios. You may purchase natural stone paving, or gather your materials from around your property and creek beds. In addition to its cost efficiency, natural stone paving...
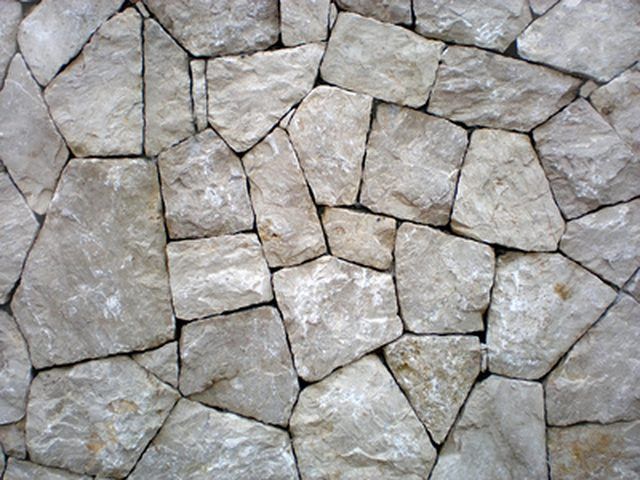
To offset the expense of buying cut paving stones, many homeowners choose natural stone paving for outdoor surfaces like driveways, paths and patios. You may purchase natural stone paving, or gather your materials from around your property and creek beds. In addition to its cost efficiency, natural stone paving provides an earthy feel to your outdoor landscaping and enhances the looks of any type of home and home siding.
Things You'll Need
Spade or shovel
Wheelbarrow
Tape measure
Soil tamper
Level
Gravel
Masonry sand
Ready-mix mortar
Water
Trowel
Cement slurry
Rubber mallet
Jointer tool
Choose what you want to lay with the natural stone paving. Mark off the area with wooden stakes and string. For a pathway you should mark the curves and corners of the path by placing stakes every 3 feet apart, while for patios and driveways you can simply place one stake in each corner and attach strings to further outline the chosen site.
Remove the sod and soil from the paving site, displacing a 6-inch depth of soil. Use a spade or shovel to remove the soil and sod and place it in a wheelbarrow to cart away as desired.
Compact the soil in the excavated area with a soil tamper. Go over the area a minimum of three times, pounding the flat end of the soil tamper against the soil. After compacting, check the site with a level and remove additional soil from high areas and tamp those spots again until you have a completely level surface for your paving project. If you have a sloped yard and want to build a natural stone pathway, you do not need a level surface, though you will still need to compact the soil in the area.
Place a 3-inch layer of gravel into the site and compact the gravel with the soil tamper. Tamp each section of the gravel a minimum of three times before proceeding.
Cover the gravel layer with a 2-inch layer of masonry sand. The sand will filter down into the gravel layer slightly. Smooth the sand down with the back of the spade or shovel.
Mix a batch of ready-mix mortar inside the emptied wheelbarrow. Apply water and stir the mixture until the mortar reaches a consistency similar to brownie batter.
Apply mortar in a 1-inch layer across the top of the masonry sand with a concrete or mortar trowel. Spread cement slurry across the bottom of each natural stone and set it into place on the mortar. The slurry promotes a stronger bond between the stones and the mortar.
Tap the stones into place with a rubber mallet to keep the surface of the pavement as close to level as possible.
Apply additional mortar into the joints between stones and smooth the joints with a jointer tool.
Continue to set the stones and smooth the joints until you complete your entire paving project. Avoid walking or placing items on the paved area until the site has a full 24 hours to dry and harden.
Tips & Warnings
If you collect natural stones from your property, search for mostly wide, flat stones of an approximate thickness.


