Bulbs
Flower Basics
Flower Beds & Specialty Gardens
Flower Garden
Garden Furniture
Garden Gnomes
Garden Seeds
Garden Sheds
Garden Statues
Garden Tools & Supplies
Gardening Basics
Green & Organic
Groundcovers & Vines
Growing Annuals
Growing Basil
Growing Beans
Growing Berries
Growing Blueberries
Growing Cactus
Growing Corn
Growing Cotton
Growing Edibles
Growing Flowers
Growing Garlic
Growing Grapes
Growing Grass
Growing Herbs
Growing Jasmine
Growing Mint
Growing Mushrooms
Orchids
Growing Peanuts
Growing Perennials
Growing Plants
Growing Rosemary
Growing Roses
Growing Strawberries
Growing Sunflowers
Growing Thyme
Growing Tomatoes
Growing Tulips
Growing Vegetables
Herb Basics
Herb Garden
Indoor Growing
Landscaping Basics
Landscaping Patios
Landscaping Plants
Landscaping Shrubs
Landscaping Trees
Landscaping Walks & Pathways
Lawn Basics
Lawn Maintenance
Lawn Mowers
Lawn Ornaments
Lawn Planting
Lawn Tools
Outdoor Growing
Overall Landscape Planning
Pests, Weeds & Problems
Plant Basics
Rock Garden
Rose Garden
Shrubs
Soil
Specialty Gardens
Trees
Vegetable Garden
Yard Maintenance
How to Replace the Chain on Poulan Chain Saws
How to Replace the Chain on Poulan Chain Saws. If you have the expertise and confidence to operate a chain saw, you have what it takes to change the chain; it's a simple procedure that's part of regular saw maintenance. The [procedure for replacing a chain](https://www.youtube.com/watch?v=nSU_ary56dA) is essentially the same for all chain saws, but...

If you have the expertise and confidence to operate a chain saw, you have what it takes to change the chain; it's a simple procedure that's part of regular saw maintenance. The procedure for replacing a chain is essentially the same for all chain saws, but the location of the chain tension adjustment screw varies, even among Poulan models; proper adjustment of the chain tension is critical for saw performance.
Before You Begin
It's important to disable the saw by pulling off the spark plug wire or unplugging it before you remove the old chain, and you should allow the saw to cool if you've been using it. Before you remove the clutch cover to expose the bar and chain, disengage the clutch brake, if your saw has one; otherwise, you'll have difficulty replacing the cover. You also need to know the location of the adjustment screw. On all Poulan Pro models, it's built into the clutch cover, but on some light-duty and electric models, it's built into the engine housing on the same side of the bar as the clutch cover. Check your owner's manual, which you can also do online.
Removing the Old Chain
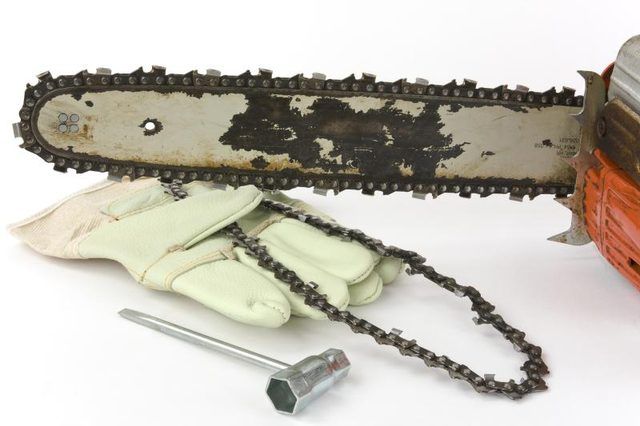
Poulan saws come with a special tool that has a socket for unscrewing the cover and a screwdriver for adjusting the tension; if you don't have this tool, use a socket wrench and a flat-head screwdriver. Set the saw upright on a table. Put on gloves, and, after disengaging the brake, loosen the two nuts holding the clutch cover, and then unscrew them and remove the cover. Push the bar back toward the saw with one hand to release the tension on the chain, and lift the chain off the bar and unhook it from the sprocket. Finally, pull the bar away from the engine housing.
Preparing for Installation
The bar and sprocket are probably caked with oil and sawdust, so clean both thoroughly with a rag. This is a good time to inspect the bar for damage, and service or replace it as needed. Pick up the new chain and arrange it so that the drive pins are facing the center of the loop it forms and the cutting teeth are on the outside. The orientation of the chain should be such that the cutting edges of the teeth on the top of the loop are facing the end of the bar, and on the bottom they are facing the saw.
Installing the Blade
Begin installation by aligning the adjustment pin on the bar with the one on the engine housing and replacing the bar on the two rods that hold it. Wind the chain around the sprocket, and then fit the drive pins into the groove on the bar and pull the bar out to seat the chain in the groove. Replace the sprocket cover and tighten the nuts hand-tight before adjusting the tension, which you do by turning the adjustment screw clockwise. When the chain is tight enough to hold the bar, tighten the sprocket cover nuts with a wrench.
Adjusting the Tension
Fine-tune the adjustment screw by turning it clockwise in quarter-turn increments until the chain doesn't sag at the bottom and you can pull the top slightly away from the bar. You shouldn't be able to pull the chain far enough to allow the drive pins to clear the bar. Test the tension by using the socket tool or a screwdriver shaft to turn the chain. It should move freely; if it doesn't, release tension by turning the screw counterclockwise until it does.